What you will build
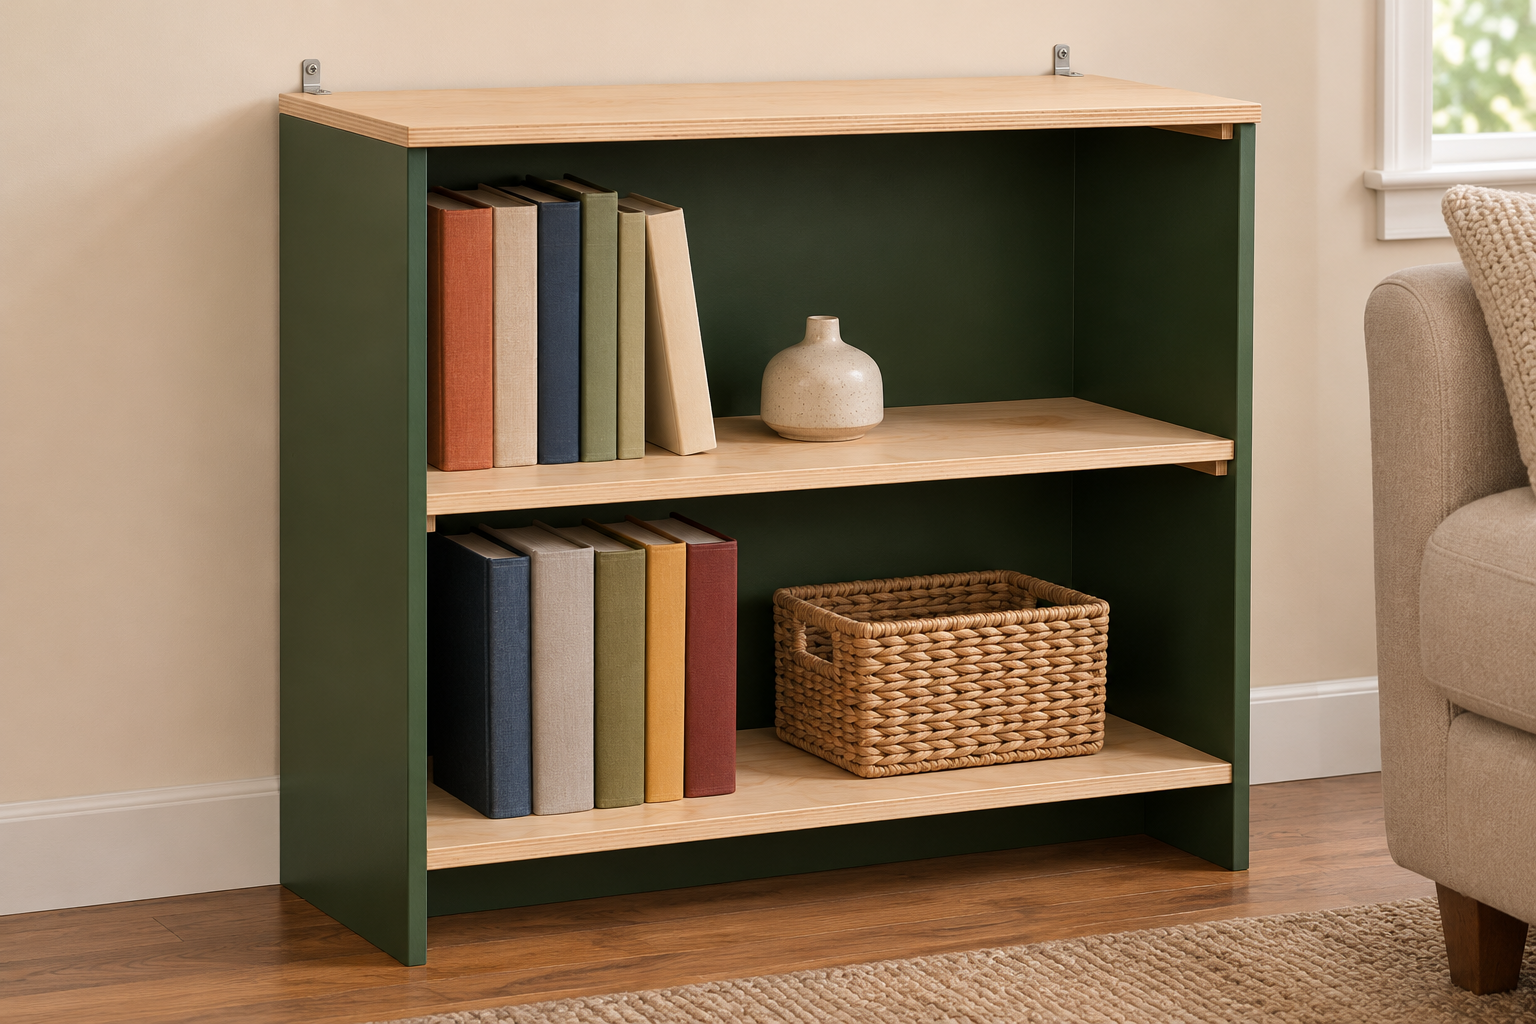
A 30-inch-tall bookcase keeps books and small baskets within easy reach. Two fixed shelves and a full plywood back create a simple open-front cabinet. Secure it to wall studs before loading; its low height does not make it tip-proof.
Check the fit
- Outside 30 W × 12 1/4 D × 30 H inches including the applied back. Clear shelf width 28 1/2 inches.
- Lower shelf top is 3 3/4 inches above the floor; upper shelf top is 16 1/2. Clear opening heights are 12 inches below the upper shelf and 12 3/4 inches below the top.
- Select a level wall location with access to wood studs and check any baseboard gap against the anti-tip hardware instructions. This plan does not specify drywall-only anchoring.
Materials and tools
- One 4 × 8-foot sheet of actual 3/4-inch plywood
- One 4 × 4-foot sheet of actual 1/4-inch plywood for the back
- One 6-foot 1×2, actual 3/4 × 1 1/2, for cleats
- 6 #8 × 1 1/2-inch top screws; 16 #8 × 1 1/4-inch cleat/shelf screws; 20 #6 × 1-inch back screws; wood glue
- Two furniture anti-tip restraints with wall and furniture fasteners specified by their maker for this construction
Tools: Circular saw with guide and full sheet support; Drill/driver, pilot/clearance bits, countersink and depth stop; Clamps, square, level, tape measure and stud finder.
Cut list
| Part | Qty | Length | Width | Thickness |
|---|---|---|---|---|
| A — Top | 1 | 30 in | 12 in | 0.75 in |
| B — Sides | 2 | 29.25 in | 12 in | 0.75 in |
| C — Fixed shelves | 2 | 28.5 in | 12 in | 0.75 in |
| D — Shelf support cleats | 4 | 12 in | 1.5 in | 0.75 in |
| E — Plywood back | 1 | 30 in | 29.25 in | 0.25 in |
Drawings and connections
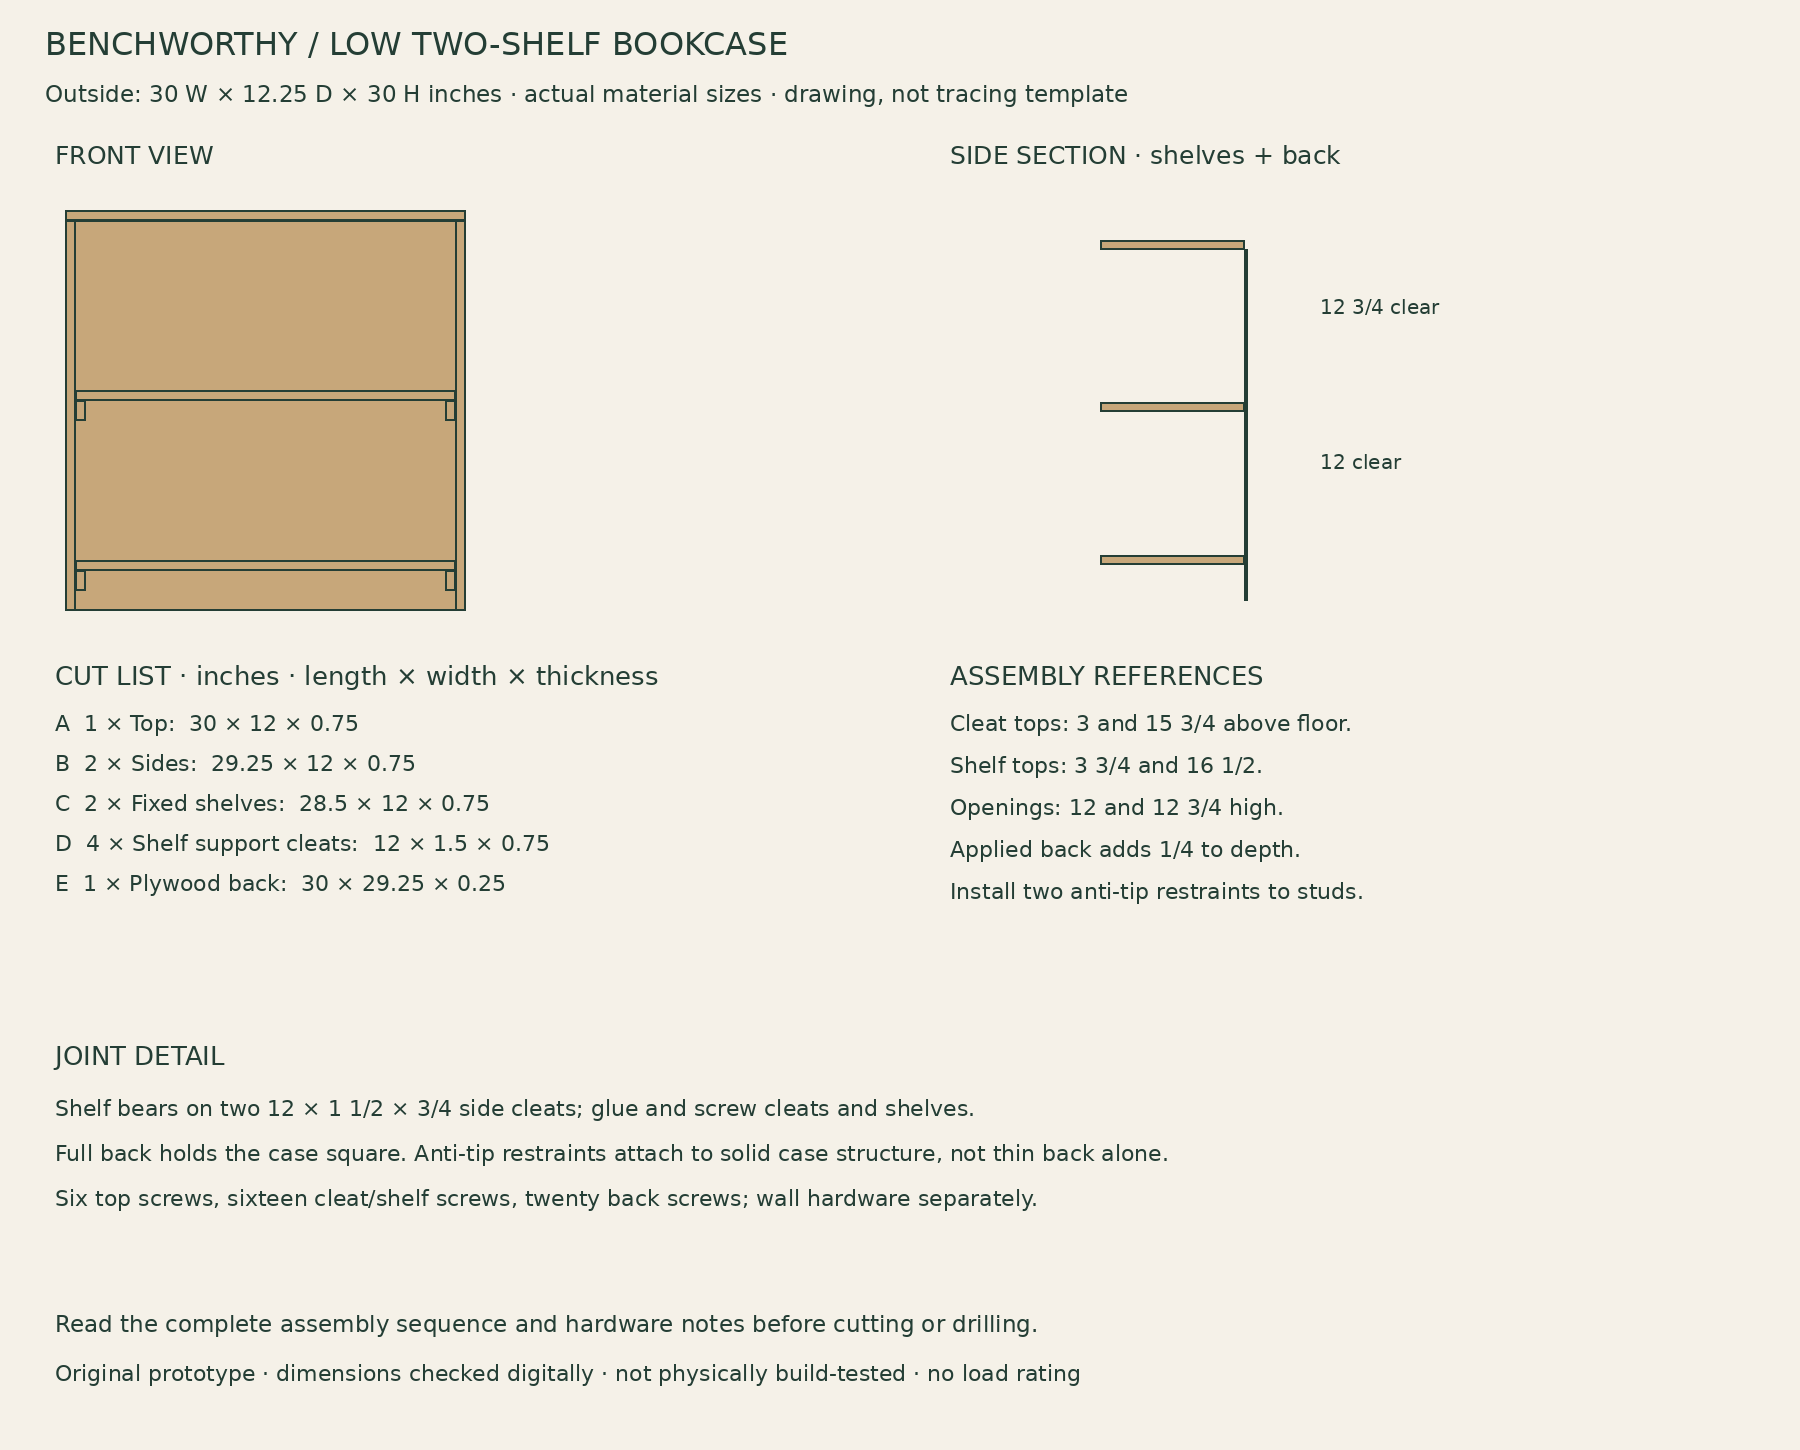
- Sides are 29 1/4 inches tall; the 3/4-inch top caps them. Shelf boards fit between the sides. Back covers the rear below the top and adds 1/4 inch to depth.
- Each 12-inch cleat lies on edge against an inside side face: 1 1/2 inches tall, projecting 3/4 inch. Cleat TOP elevations are 3 and 15 3/4 inches from the floor.
- Two #8 × 1 1/4 screws per cleat, through cleat into side, at 3 and 9 inches from front; keep pilots centered vertically. Two more per shelf end, down through shelf into cleat, at 4 and 8 inches from front. Glue both contacts.
- Top: three #8 × 1 1/2 screws into each side top edge, at 2, 6 and 10 inches from front. Back: five #6 × 1 screws into each side rear edge, five into each shelf rear edge; keep 2 inches away from corners and space evenly. Pre-drill plywood edges.
- Cut five 12-inch crosscut bands from the 8-foot sheet length; take one top, two sides and two shelves across those bands. Measure each new band after the preceding kerf.
Assembly
- Cut and inspect. Cut the top, sides, shelves and back square. Match side lengths and shelf lengths. Cut four cleats from the 1×2; use the 6-foot stock to leave kerf allowance. Reject delaminated plywood or split cleats.
- Attach shelf supports. Lay the sides inside-face up. Mark cleat tops at 3 and 15 3/4 inches from the bottom. Glue, clamp and screw the cleats to the sides with the specified pilot and clearance holes. Keep each pair level with its mate.
- Assemble the cabinet. Stand the sides upright, place the shelves on the cleats and clamp to the 30-inch outside width. Glue and screw shelves down to the cleats. Cap with the top, drill pilots into side top edges and drive six top screws. Do not overdrive.
- Square with the back. Lay the cabinet face down on padded supports. Check equal diagonals across the rear, then glue and screw on the 30 × 29 1/4 back flush to side edges and bottoms. Mark shelf elevations on the back before drilling. The back must be attached before standing the case.
- Finish and restrain. Allow adhesive cure, sand and finish. Put the empty case in its final level position. Install two compatible anti-tip restraints to sound side/top structure and wall studs exactly as their manufacturer directs; do not fasten furniture-side restraints only to the thin back.
- Load gradually. Check joints and restraints, then add books gradually with heavier items on the lower shelf. Stop for sagging, movement, loose fasteners or cracking. No shelf load rating has been established.
Use and care
- Do not climb, sit or stand on the bookcase. Keep tempting items off the top where children could climb for them.
- Recheck anti-tip attachments after moving and periodically in use. Empty before moving.
- The plywood back braces the case; it does not replace wall restraints.
Build notes
This original plan has not been physically build-tested. Digital checks cover dimensions and part fit; they do not establish joint strength, load capacity or long-term performance. Check the actual materials and hardware, dry-fit before fastening, and stop use if joints loosen or parts deform.
Furniture anchoring reference: CPSC Anchor It!. Follow the selected restraint manufacturer’s installation instructions.