
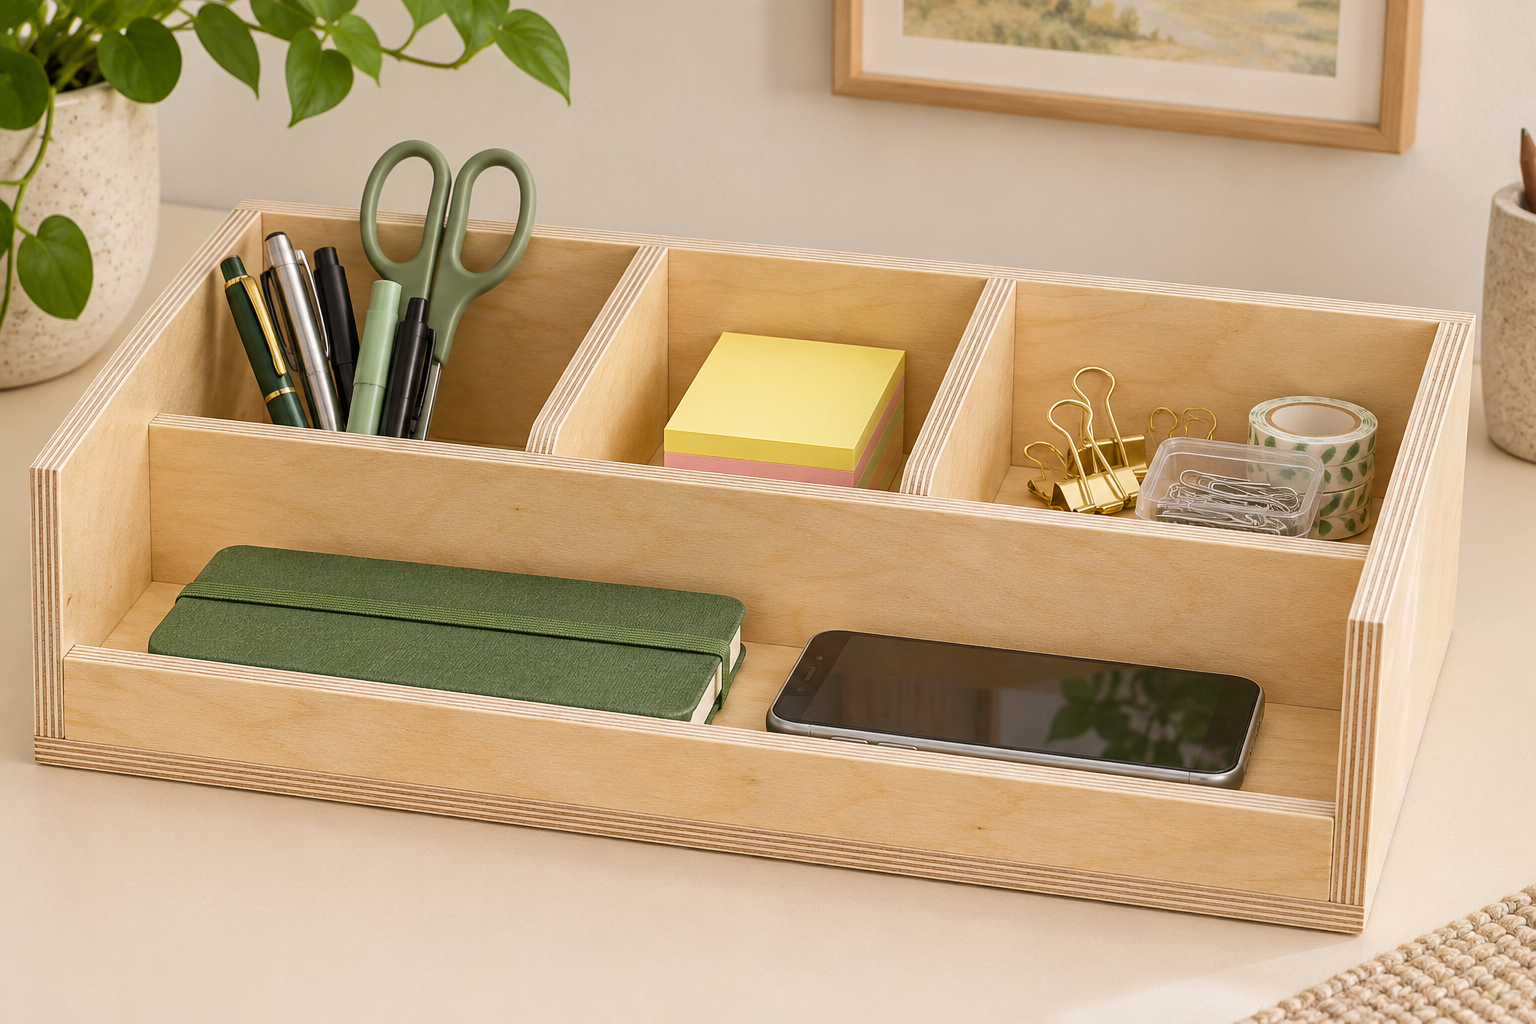
Design in development — not reviewed or build tested.
Materials and hardware
- One 24 × 24-inch panel of actual 1/2-inch plywood with sound edges
- Wood glue and masking tape for dry assembly
- Optional furniture finish
Required tools
- Circular saw with guide and support for small parts
- Clamps, square, ruler, sanding block and small glue brush
Fit checks and limitations
Outside 18 × 8 × 4 1/2 inches. Front trough: 17 × 2 1/2 inches clear. Rear compartments: 5 1/2, 5 and 5 1/2 inches wide, each 4 inches deep. A phone rests in the trough; there is no angled charging stand or cable opening. Cut a full-size paper layout and check your notebook and supplies before cutting wood.
What you will build
Keep a notebook or phone in the front trough and separate pens, scissors and small supplies in three rear compartments. This desktop caddy is assembled from straight plywood pieces with glued joints; it stays on the desk rather than serving as a carry box.
Check the fit
- Outside 18 × 8 × 4 1/2 inches. Front trough: 17 × 2 1/2 inches clear. Rear compartments: 5 1/2, 5 and 5 1/2 inches wide, each 4 inches deep.
- A phone rests in the trough; there is no angled charging stand or cable opening.
- Cut a full-size paper layout and check your notebook and supplies before cutting wood.
Materials and tools
- One 24 × 24-inch panel of actual 1/2-inch plywood with sound edges
- Wood glue and masking tape for dry assembly
- Optional furniture finish
Tools: Circular saw with guide and support for small parts; Clamps, square, ruler, sanding block and small glue brush.
Cut list
| Part | Qty | Length | Width | Thickness |
|---|---|---|---|---|
| A — Base | 1 | 18 in | 8 in | 0.5 in |
| B — Back | 1 | 18 in | 4 in | 0.5 in |
| C — Sides | 2 | 7.5 in | 4 in | 0.5 in |
| D — Front lip | 1 | 17 in | 1 in | 0.5 in |
| E — Long divider | 1 | 17 in | 3 in | 0.5 in |
| F — Rear dividers | 2 | 4 in | 3 in | 0.5 in |
Drawings and connections
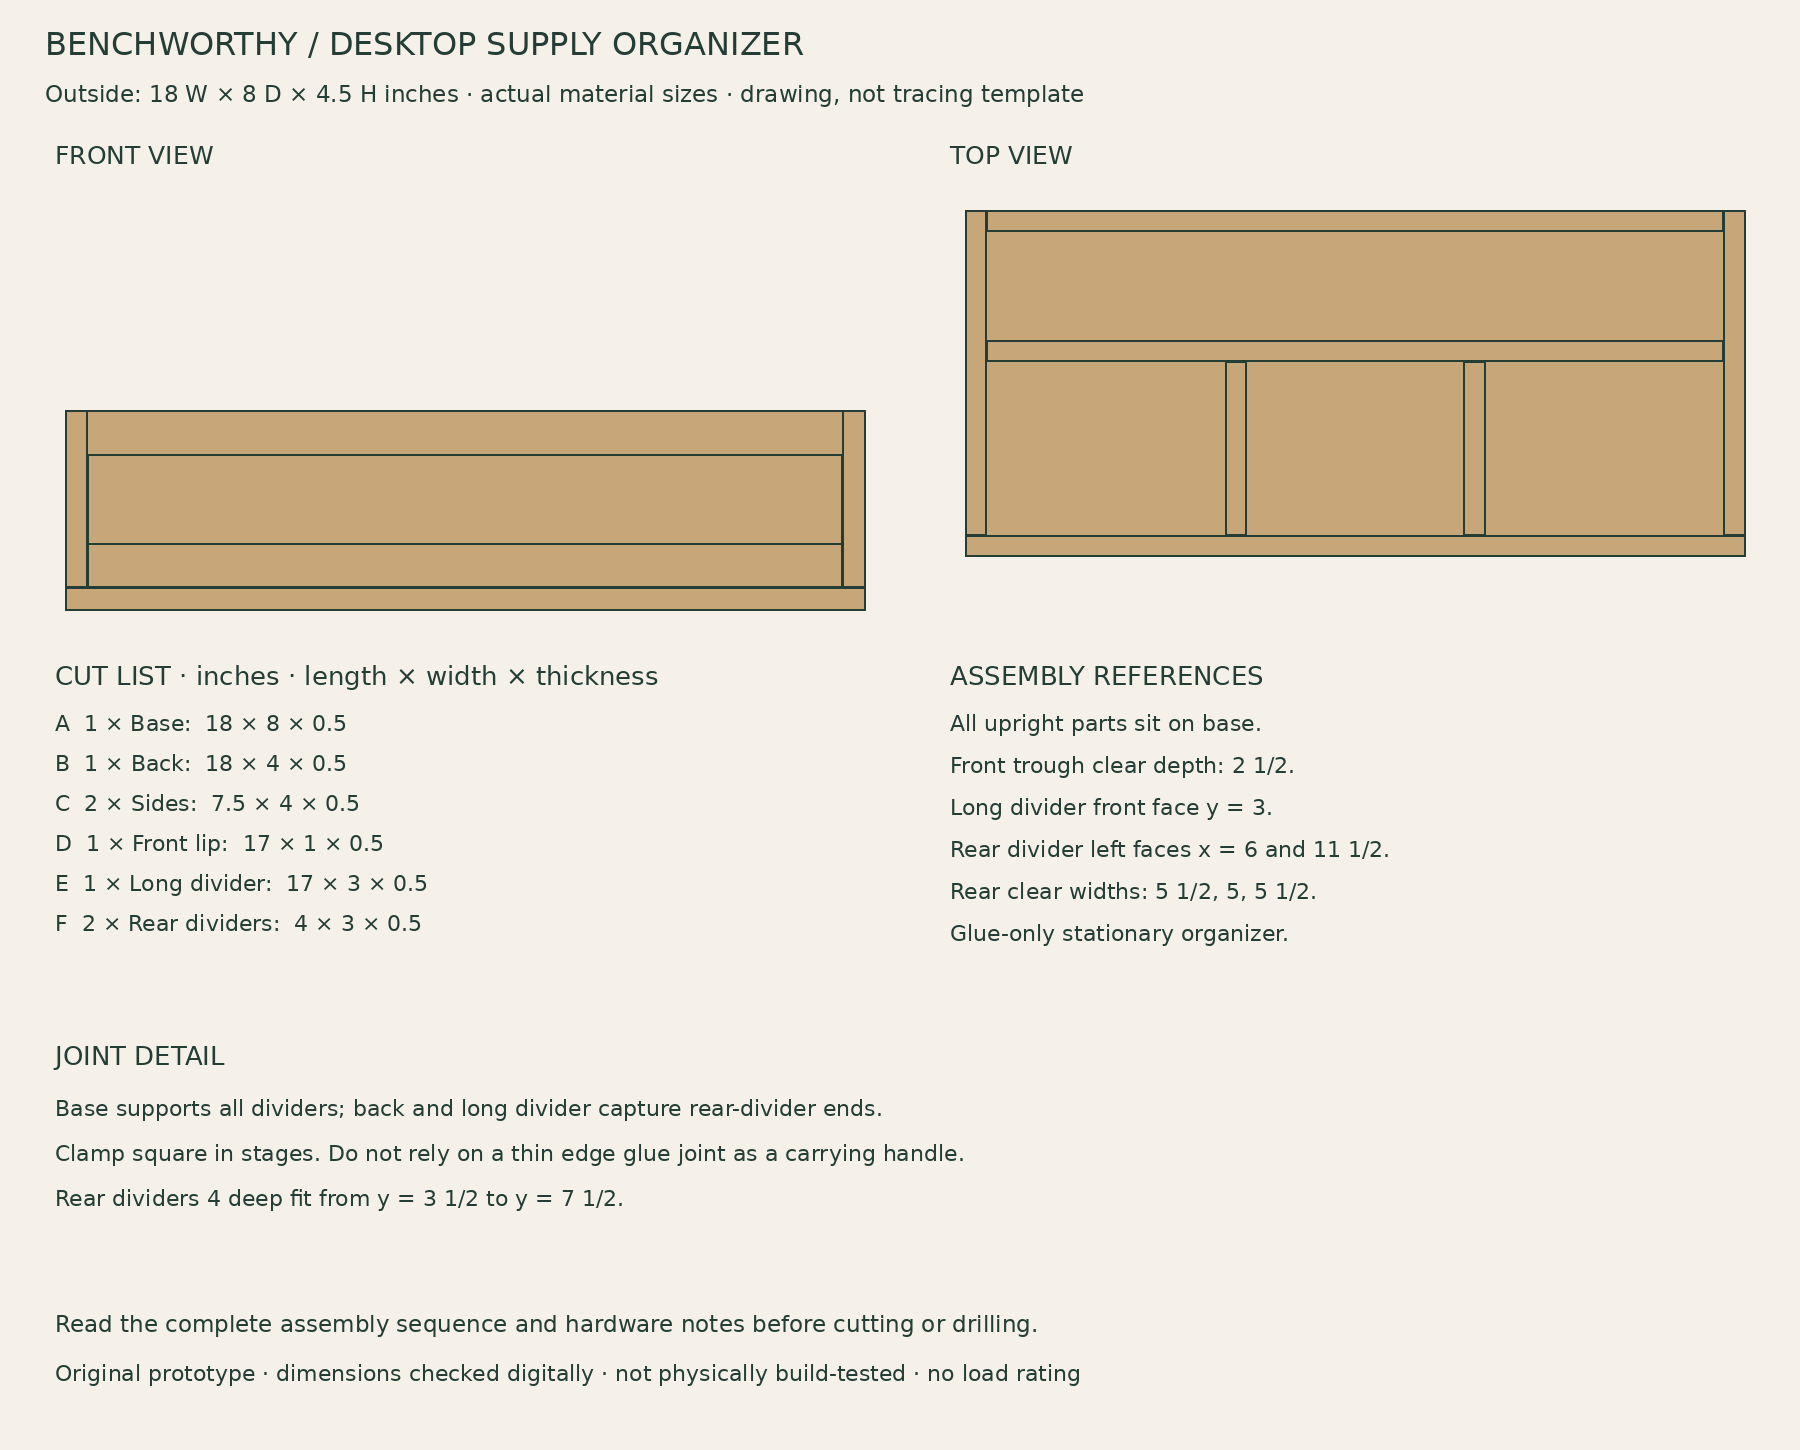
- All vertical pieces sit on top of the 1/2-inch base. Back covers the full 18-inch rear edge; sides fit in front of it.
- Front lip fits BETWEEN sides, flush with front edge. Long divider front face is 3 inches from base front. Rear dividers left faces are 6 and 11 1/2 inches from base left.
- Glue base contact edges and meeting vertical edges. No screws enter the thin plywood edges. Clamp each subassembly until the glue has set; full cure before use.
- 24 × 24 panel layout: first crosscut an 8-inch band; cut the 18 × 8 base from it. From the remaining panel rip two 4-inch bands, two 3-inch bands and one 1-inch band. Allocate back/sides, long divider/rear dividers, then front lip. Allow saw kerf.
Assembly
- Prepare the pieces. Use a supported cutting setup appropriate to small parts; keep hands away from the blade and do not make unsupported tiny cuts. Label the parts and lightly sand inside faces before assembly.
- Mark the footprint. On the base mark sides at x = 0–1/2 and 17 1/2–18, back at y = 7 1/2–8, lip at y = 0–1/2, and long divider at y = 3–3 1/2. Mark rear dividers at x = 6–6 1/2 and 11 1/2–12.
- Glue the outer shell. Dry-fit all parts first. Glue and clamp the back and sides to the base, keeping the corners square. Fit the 17-inch front lip between the sides. Use a flat reference and clamp pads; let this stage set before adding dividers.
- Install the dividers. Glue the 17-inch long divider to the base and sides on its marks. Glue the two rear dividers between it and the back; their front ends start at y = 3 1/2. Clamp gently without bowing the thin panels. Verify the three clear widths.
- Finish and organize. Allow full adhesive cure. Ease all touch edges and remove squeeze-out. Finish and cure before adding stationery. Lift the empty organizer under its base; do not pick it up by a divider.
Use and care
- Indoor, dry use only. Keep drinks in a separate coaster.
- Do not force oversized items into a compartment.
- Inspect glued joints periodically; this original assembly has not been physically tested.
Build notes
This original plan has not been physically build-tested. Digital checks cover dimensions and part fit; they do not establish joint strength, load capacity or long-term performance. Check the actual materials and hardware, dry-fit before fastening, and stop use if joints loosen or parts deform.