
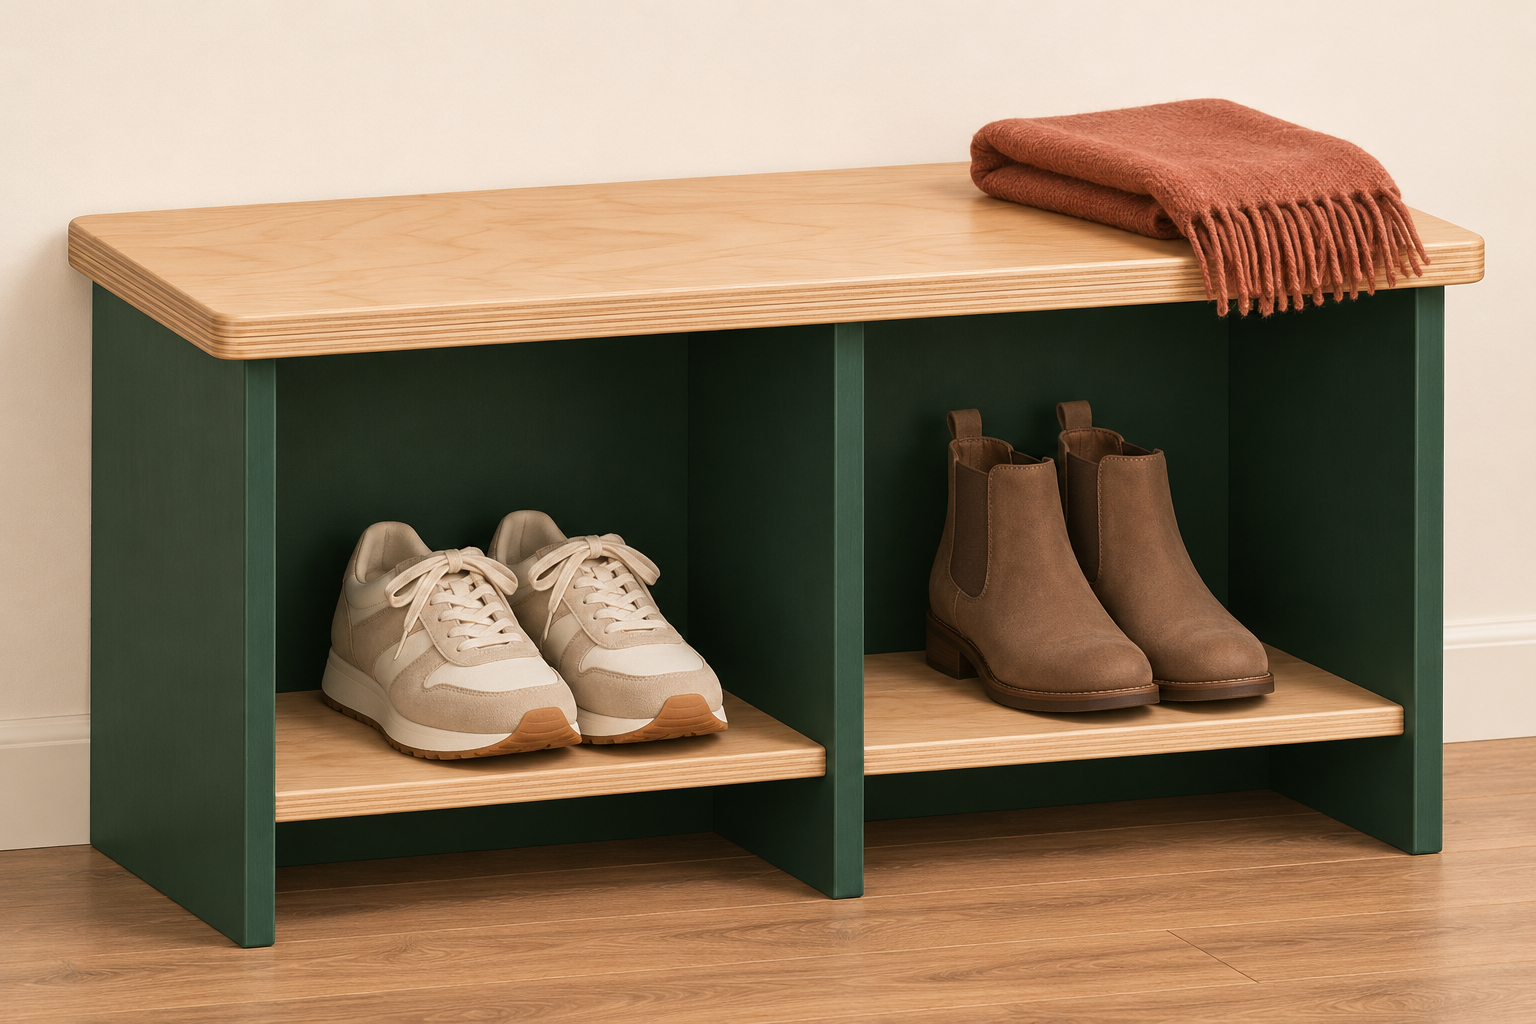
Design in development — not reviewed or build tested.
Materials and hardware
- One 4 × 8 sheet of actual 3/4-inch cabinet-grade plywood
- One 6-foot 1×2 board, actual 3/4 × 1 1/2
- Wood glue; #8 wood screws in 1 1/4, 1 3/4 and 2 1/2-inch lengths
- Indoor furniture finish
Required tools
- Circular saw with straightedge or track guide
- Drill and driver with pilot and countersink bits
- Clamps and flat cauls for seat lamination
- Square, tape measure and sandpaper
Fit checks and limitations
36 W × 14 D × 18 H inches. Each shoe cubby 16 3/8 W × 12 1/4 H with about 12 1/4 usable depth. Check actual shoes. Untested seating prototype; physical validation required before seating use, no weight rating.
A compact home for everyday shoes
Give the shoes you wear most a place beside the door. This 36-inch-wide bench combines a laminated plywood seat with two open cubbies, each sized for a typical pair of shoes or modest ankle boots after checking your actual footwear. Low shelves lift the shoes off the floor and leave a small cleaning gap underneath.
Two end panels, a center divider and a full back meet the seat underside directly. The divider shortens the unsupported seat spans; the back ties the panels together against racking. The intended use is a place to sit while putting shoes on, but this design is an untested seating prototype and needs physical validation before seating use. No weight rating is assigned.
Check shoe fit and entryway clearance
- Overall size is 36 W × 14 D × 18 H inches, without a cushion or added feet. Each opening is 16 3/8 inches wide × 12 1/4 inches high above its shelf; usable depth is about 12 1/4 inches to the back. Shelf panels are slightly smaller to lift out.
- Measure a pair together at the widest point, the toe-to-heel length and the boot height. Leave hand clearance. Long shoes or tall boots may need a different design; do not assume the illustration guarantees your shoe size fits.
- Check the door swing and the clear walking route with a taped 36 × 14-inch footprint. Keep the bench on a flat, dry floor. Added feet or a cushion change the seat height and stability assumptions.
- This is indoor furniture. Seal all panel edges and wipe wet shoes before storing them; do not let water pool on plywood.
Cut list
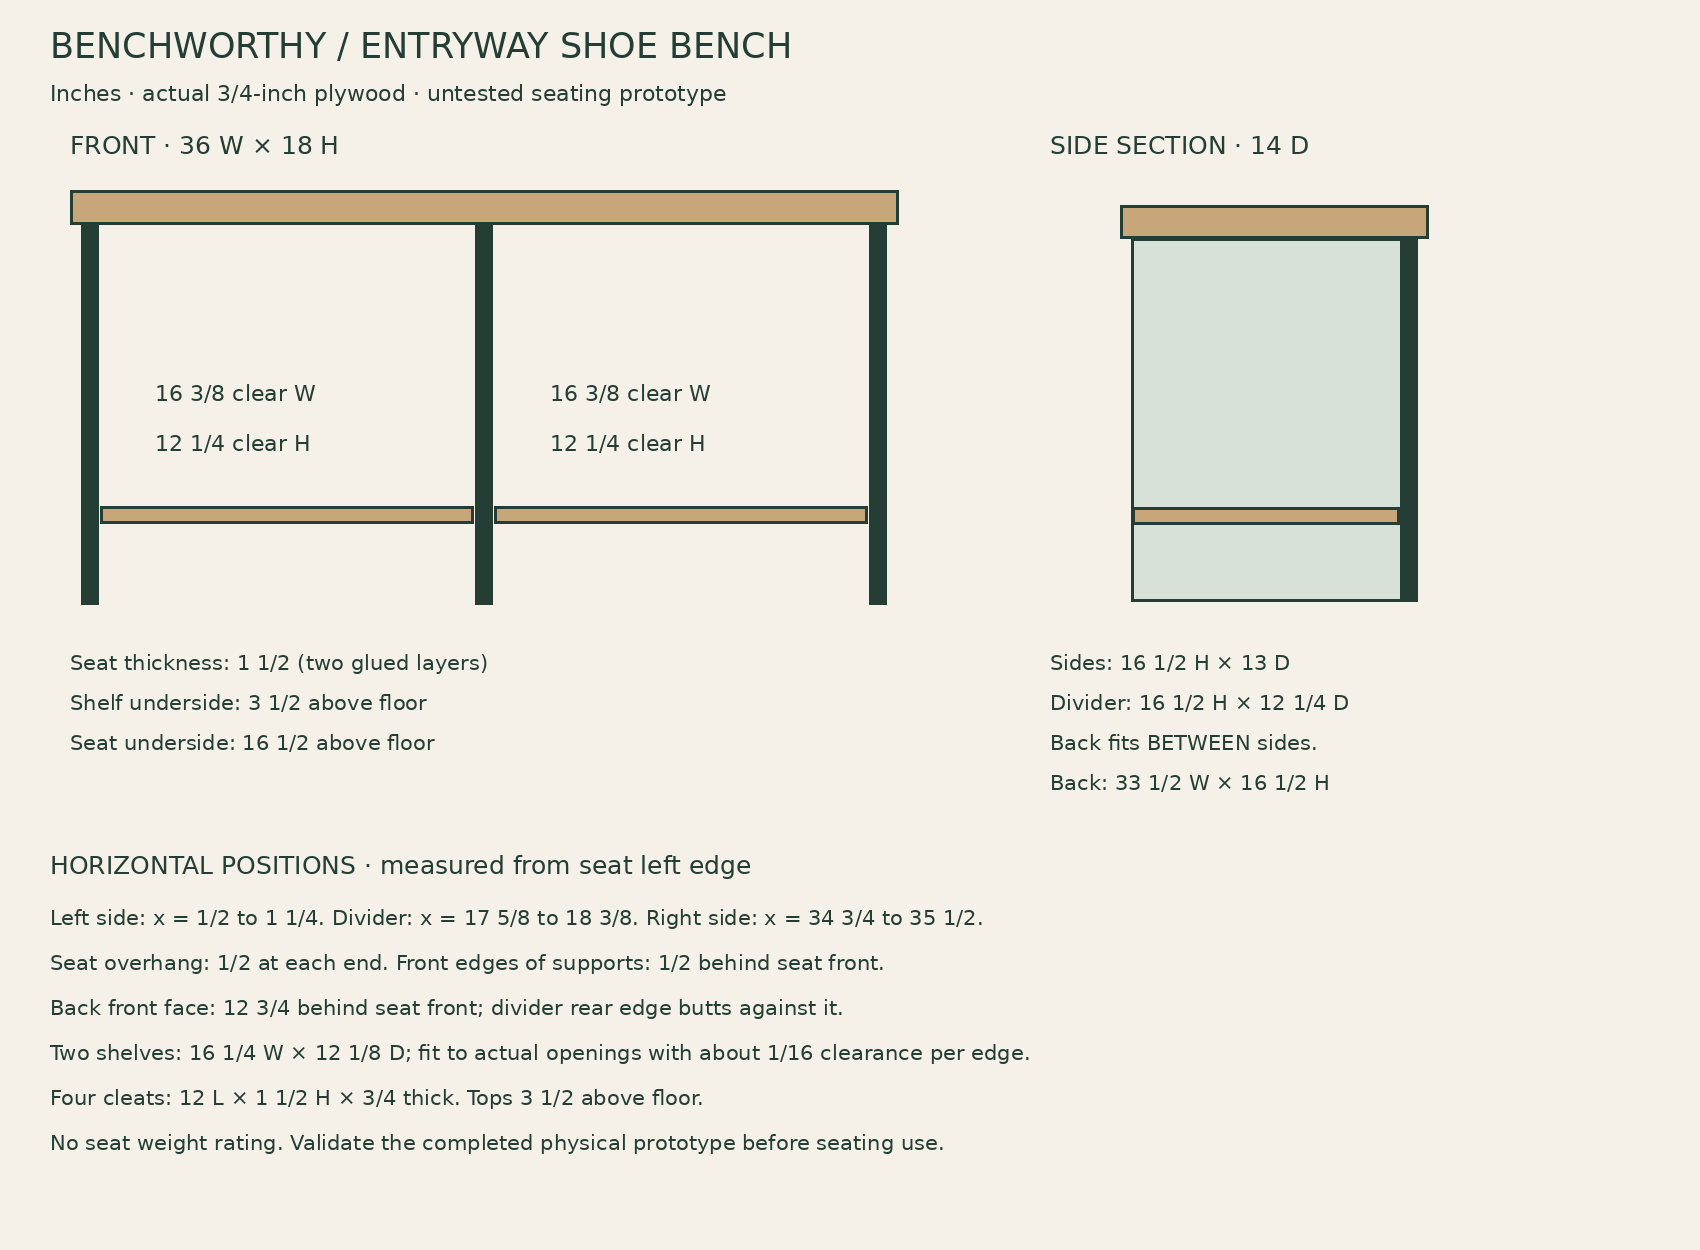
All dimensions are inches and assume actual 3/4-inch plywood. The cleats are actual 3/4 × 1 1/2-inch 1×2. Use sound cabinet-grade plywood with no voids at joints. Measure thickness first: side/divider height = 18 minus twice the seat-layer thickness. Back width = 35 minus twice the side thickness. Keep the divider centered and fit shelves to the actual openings.
| ID | Part | Qty | Finished size |
|---|---|---|---|
| A | Seat layers | 2 | 36 × 14 × 3/4 |
| B | Sides | 2 | 16 1/2 H × 13 D × 3/4 |
| C | Back between sides | 1 | 33 1/2 W × 16 1/2 H × 3/4 |
| D | Center divider | 1 | 16 1/2 H × 12 1/4 D × 3/4 |
| E | Lift-out shoe shelves | 2 | 16 1/4 W × 12 1/8 D × 3/4 |
| F | Shelf cleats | 4 | 12 L × 1 1/2 H × 3/4 |
Material layout: one 48 × 96-inch sheet of 3/4-inch plywood supplies the panels. Rip a 36-inch-wide strip, then lay out sequential bands: two 14-inch bands for the seat layers; a 16 1/2-inch band for the back; a 13-inch band holding two side blanks rotated to fit across the strip; a 12 1/4-inch band for the divider; and a 12 1/8-inch band holding both shelves side by side. The bands total under 84 inches including nominal 1/8-inch kerfs. Trim each part to its listed dimensions and cut the shelves after assembly. One 6-foot 1×2 supplies four 12-inch cleats with trimming allowance.
Construction drawing
Glue and fasteners
- Wood glue suitable for the plywood; flat clamping cauls and enough clamps for full seat-lamination contact. A gap between seat layers is not a sound lamination.
- About 22 #8 × 1 1/4-inch wood screws: six retain the seat layers from below; 15 attach the shelf cleats, with a spare. Countersink underside seat screws flush so they do not obstruct the bearing panels.
- Twelve #8 × 1 3/4-inch wood screws: eight through the sides into the back edges, four through the back into the divider rear edge. Predrill on the plywood centerline and avoid intersecting fasteners.
- Twelve #8 × 2 1/2-inch wood screws through the 1 1/2-inch seat into the tops of the sides, divider and back. These penetrate about 1 inch into the vertical panels. Use wood screws, correctly sized pilot holes and flush heads; do not substitute drywall screws.
- Finish suitable for indoor furniture, sandpaper and optional plugs for countersunk top screws. Plugs are decorative; do not enlarge the structural pilot holes to conceal them.
Build sequence
- Cut A–D and the cleats. Label panel faces and keep both sides and divider the same height. Dry-fit them under the seat; all bearing edges must meet the seat underside without gaps. Sand exposed edges and lightly ease the seat edges without reducing the bearing surfaces.
- Glue the two 36 × 14-inch seat layers face-to-face. Clamp between flat cauls with aligned edges. From the underside, drive six 1 1/4-inch screws at x = 6, 18 and 30 inches from the left and y = 3 and 10 inches from the front. Countersink flush and let the glue cure fully.
- Assemble the back between the sides. Align all panel bottoms; the back rear face is flush with the side rear edges. Glue and clamp square. Drive four 1 3/4-inch screws through each side into the back edge at heights 2, 7, 12 and 15 inches above the bottom, centered across the back thickness.
- Center the divider between the side panels, with its front edge flush to their fronts and its rear edge against the back front face. Glue that rear edge. Drive four 1 3/4-inch screws through the back into the divider rear edge at the same four heights. Measure both front openings: each should be 16 3/8 inches wide.
- Install four shelf cleats: one inside each end panel and one on each face of the divider. Their tops are 3 1/2 inches above the floor. Center each 12-inch cleat along the 12 1/4-inch usable bay depth, leaving 1/8 inch at each end. Glue and fasten through the cleat face with 1 1/4-inch screws centered in its height. Use four screws per outer cleat and four on the divider’s left face, at 1 1/2, 4 1/2, 7 1/2 and 10 1/2 inches from the cleat front. Use three on the divider’s right face at 3, 6 and 9 inches from its front. This staggering prevents the opposing screws from meeting inside the thin divider. Test screw penetration in scrap first.
- Set the laminated seat over the carcass with 1/2-inch overhang on all four outer edges. Panel positions measured from the seat left are: left side 1/2–1 1/4, divider 17 5/8–18 3/8, right side 34 3/4–35 1/2 inches. Their fronts are 1/2 inch behind the seat front. Confirm the back rear is 1/2 inch ahead of the seat rear.
- Glue the panel tops to the seat underside and clamp. Drive three 2 1/2-inch screws down into each side and the divider, centered in their 3/4-inch edges, at y = 2, 6 1/2 and 11 inches from the seat front. Add three into the back at y = 13 1/8 inches and x = 6, 18 and 30 inches. Pilot carefully through the full seat thickness into the panel edges; these locations avoid the seat-lamination screws.
- After checking squareness and allowing the joints to cure, measure each cubby. Cut its shelf about 1/8 inch smaller in width and depth than the measured opening, giving roughly 1/16-inch clearance around it. Ease the edges and rest the shelves on their cleats; they lift out for cleaning and inspection.
- Apply and cure the finish. Place the bench on a flat floor and verify both ends, divider and back bear as intended without rocking. Check every joint and fastener. The completed prototype needs seating strength and stability validation before anyone sits on it.
Prototype checks before seating use
Unreviewed prototype — not build tested. The geometry, panel allocation, bearing layout and nominal screw positions have been checked digitally. Seat-lamination quality, plywood strength, edge fasteners and resistance to seating loads have not been physically validated. No person-weight capacity is claimed. Do not treat a successful dimensional fit as a seating test.
- Validate the completed bench’s seat, joints and stability before seating use. Keep it out of seating service until that is complete; the concept render depicts storage, not evidence of a tested seat.
- Do not stand, jump or climb on the bench or use its shoe shelves as steps. Stop use if the seat flexes excessively, a joint opens, plywood splits or the unit rocks.
- Keep the two shoe shelves removable; do not count their cleats as seat support. The seat bears on the two sides, center divider and back.