
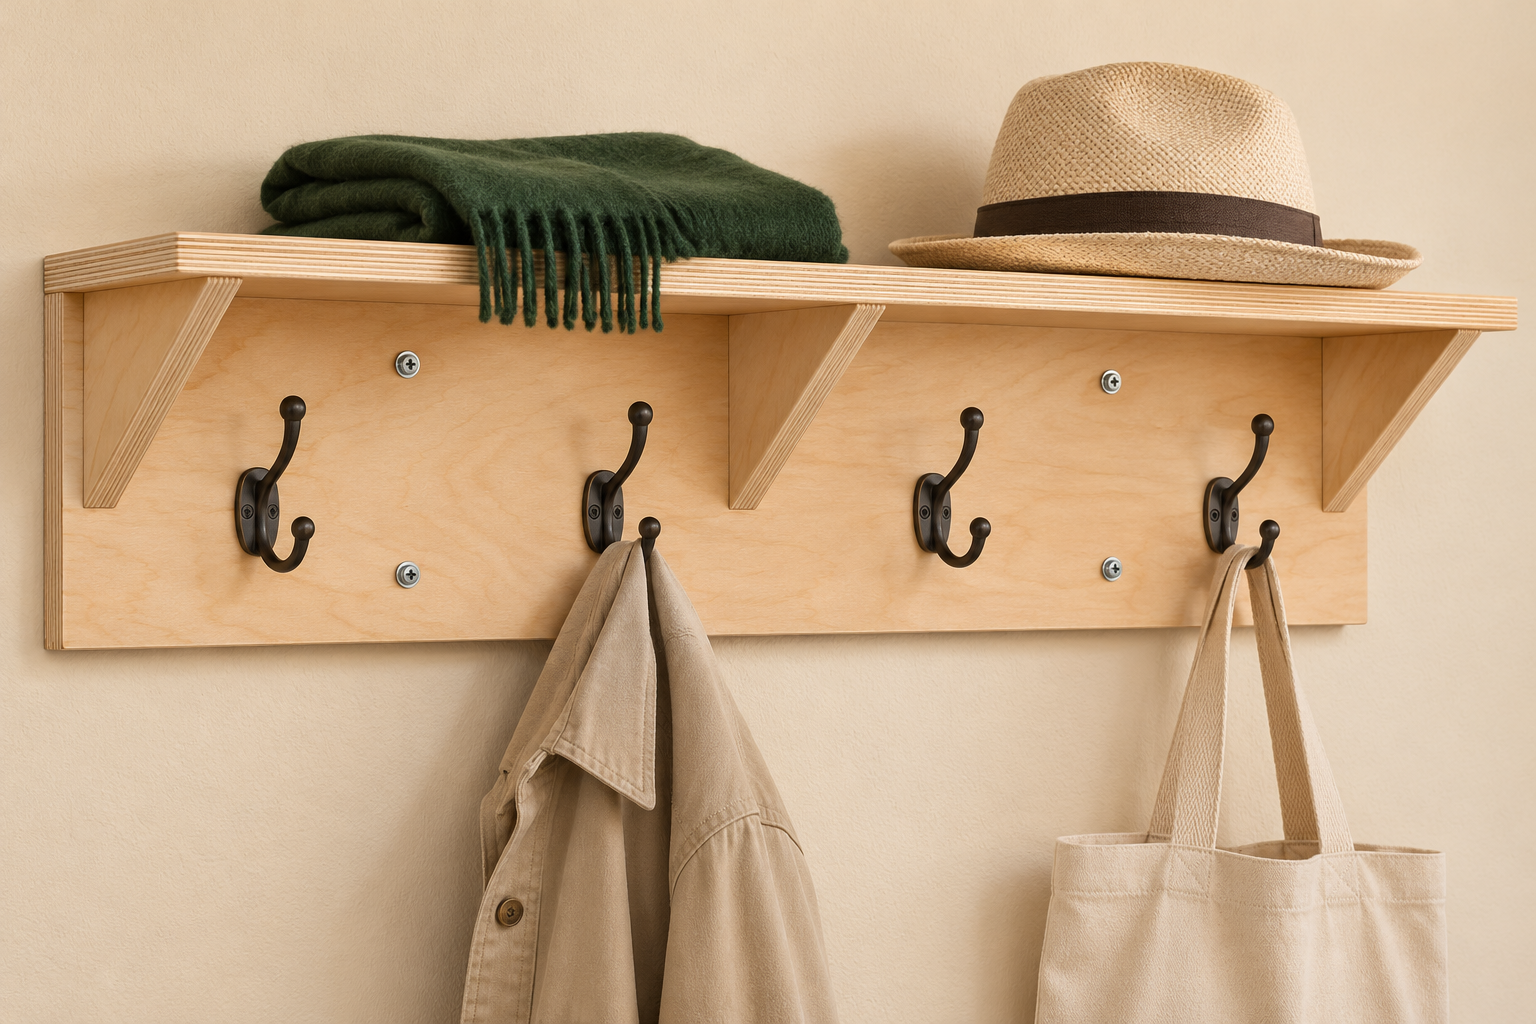
Design in development — not reviewed or build tested.
Materials and hardware
- One 24 × 48-inch panel of actual 3/4-inch sound plywood
- Four two-hole coat hooks whose bases fit below the shelf; use eight hook screws suited to 3/4-inch plywood without breaking through the back
- 10 #8 × 1 1/2-inch wood screws; 6 #8 × 1 1/4-inch wood screws; glue
- Four 3-inch washer-head structural wood screws, selected for wood-stud mounting and the actual wall; minimum 1 1/2-inch embedment into sound studs, excluding drywall and backboard
Required tools
- Circular saw with guide; jigsaw for gusset diagonals
- Drill/driver, pilot and clearance bits, countersink and depth stop
- Clamps, square, level, tape measure and stud finder
Fit checks and limitations
Overall 32 inches wide, 6 inches from wall to shelf front, 8 inches high. Shelf top is 3/4 inch above the backboard. This mounting layout is for two sound wood studs at 16 inches on center behind 1/2- or 5/8-inch drywall. It does not cover hollow-wall anchors, masonry or metal studs. Choose hook bases that fit the 7 1/4-inch backboard and have screw positions clear of the gussets and wall fasteners. Lay the actual hooks out before drilling.
What you will build
Hang four everyday coats or bags beneath a shallow shelf for hats and small entryway items. Three triangular brackets support the shelf while keeping the hook spaces open. The backboard mounts to two wood studs 16 inches apart.
Check the fit
- Overall 32 inches wide, 6 inches from wall to shelf front, 8 inches high. Shelf top is 3/4 inch above the backboard.
- This mounting layout is for two sound wood studs at 16 inches on center behind 1/2- or 5/8-inch drywall. It does not cover hollow-wall anchors, masonry or metal studs.
- Choose hook bases that fit the 7 1/4-inch backboard and have screw positions clear of the gussets and wall fasteners. Lay the actual hooks out before drilling.
Materials and tools
- One 24 × 48-inch panel of actual 3/4-inch sound plywood
- Four two-hole coat hooks whose bases fit below the shelf; use eight hook screws suited to 3/4-inch plywood without breaking through the back
- 10 #8 × 1 1/2-inch wood screws; 6 #8 × 1 1/4-inch wood screws; glue
- Four 3-inch washer-head structural wood screws, selected for wood-stud mounting and the actual wall; minimum 1 1/2-inch embedment into sound studs, excluding drywall and backboard
Tools: Circular saw with guide; jigsaw for gusset diagonals; Drill/driver, pilot and clearance bits, countersink and depth stop; Clamps, square, level, tape measure and stud finder.
Cut list
| Part | Qty | Length | Width | Thickness |
|---|---|---|---|---|
| A — Backboard | 1 | 32 in | 7.25 in | 0.75 in |
| B — Shelf | 1 | 32 in | 6 in | 0.75 in |
| C — Triangular gusset blanks | 3 | 4.5 in | 4.5 in | 0.75 in |
Drawings and connections
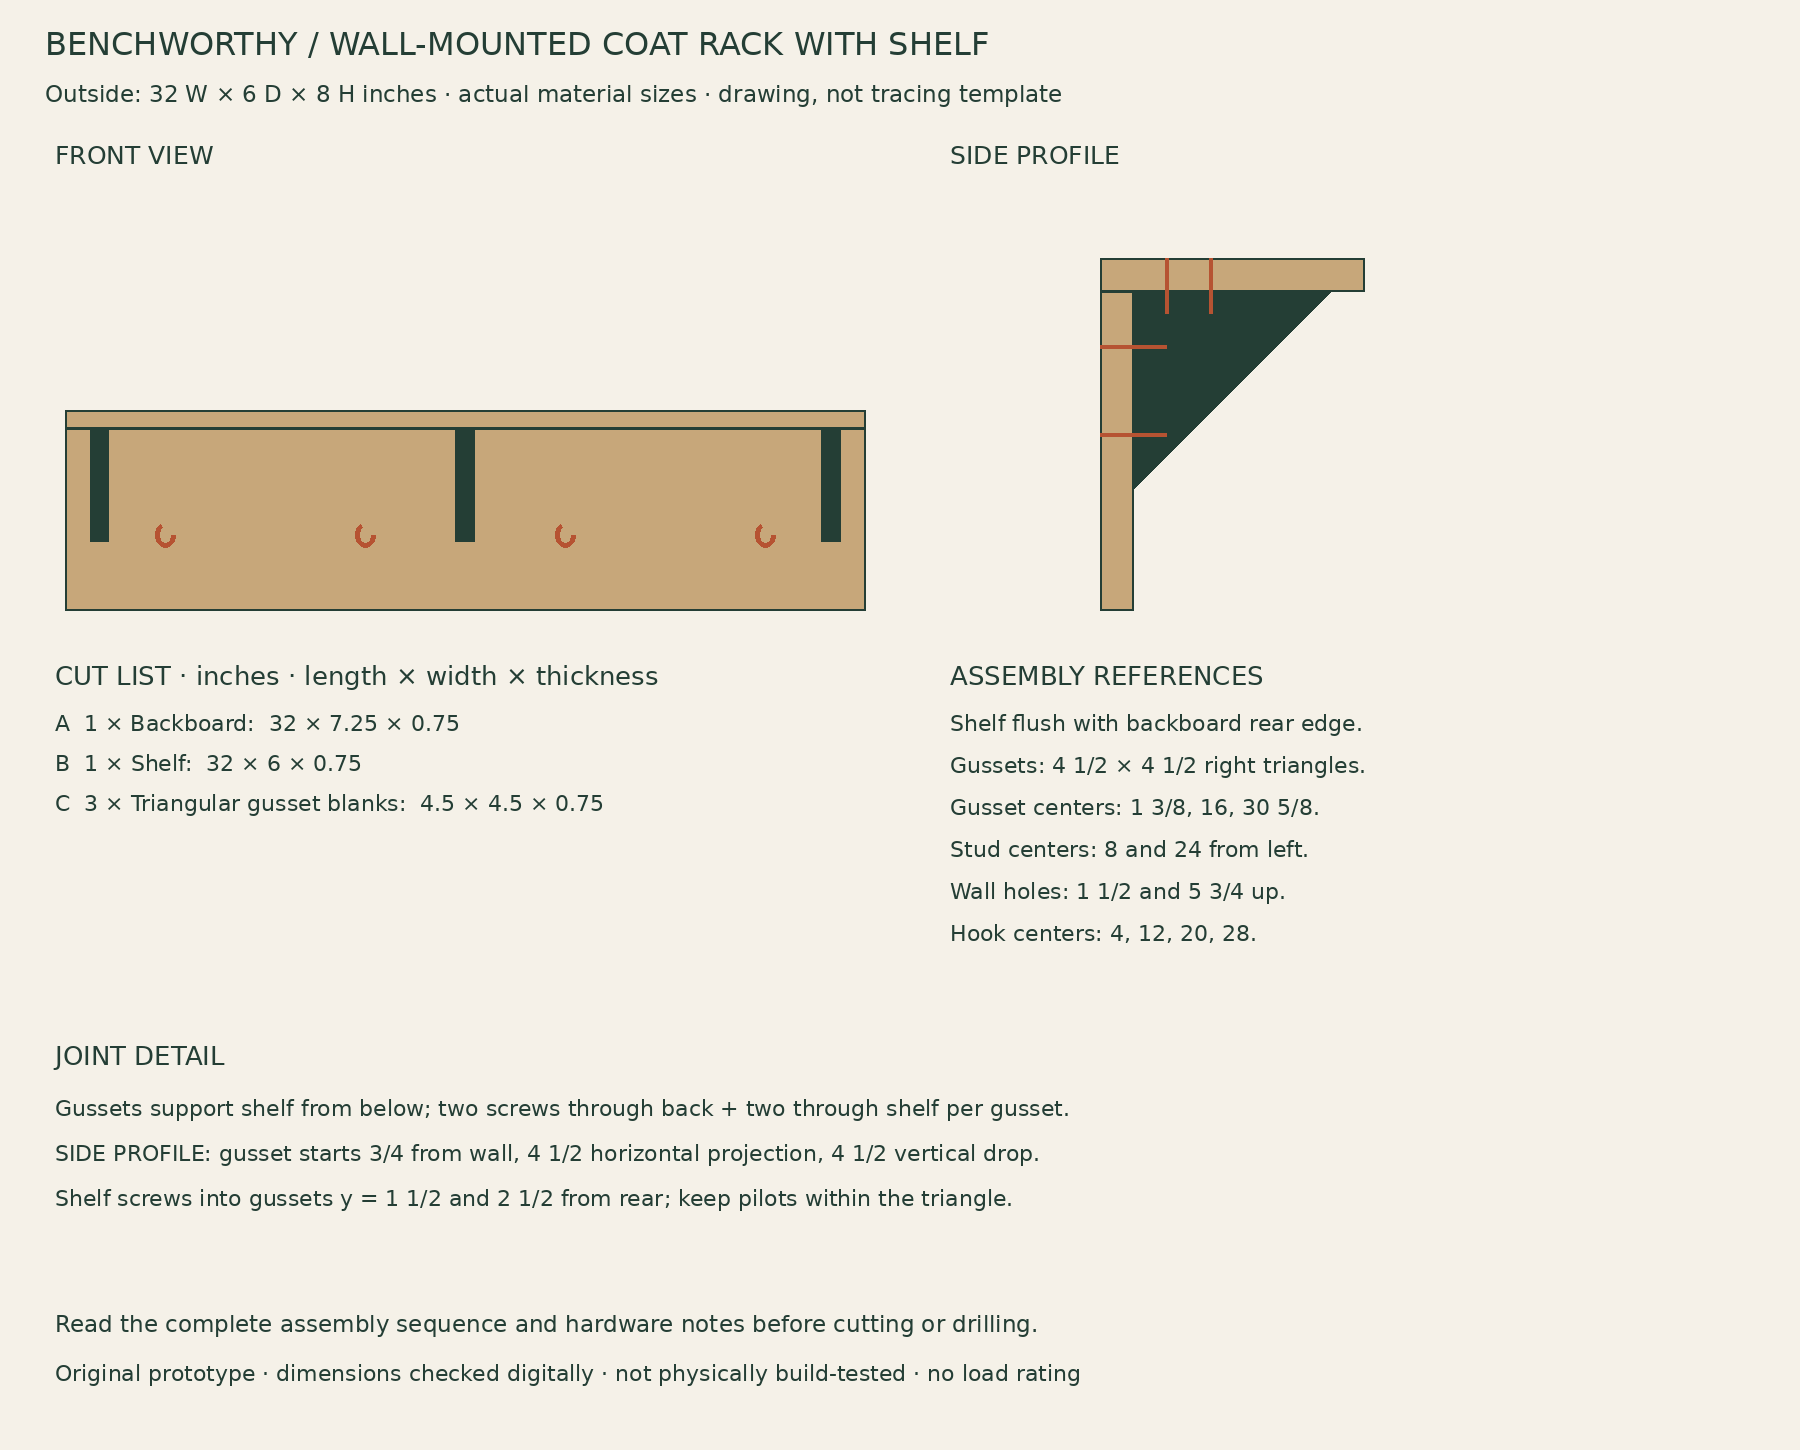
- Shelf sits on top of the backboard, flush at the wall-side rear edge. Gussets meet the backboard front face and shelf underside. Their horizontal and vertical legs are each 4 1/2 inches.
- Gusset centerlines: x = 1 3/8, 16, 30 5/8 inches from left. Glue mating faces. Two 1 1/2-inch screws enter each gusset from the BACK at z = 4 and 6 inches above backboard bottom.
- Four 1 1/2-inch screws through shelf into backboard top edge: x = 4, 12, 20, 28; y = 3/8 from wall-side shelf edge. Six 1 1/4-inch screws through shelf into gussets: at each gusset centerline, y = 1 1/2 and 2 1/2 from rear. These positions stay within the triangular wood beneath.
- Wall fasteners: x = 8 and 24, z = 1 1/2 and 5 3/4 inches from backboard bottom. Verify actual stud centers before drilling. Three-inch screw less 3/4 backboard and 5/8 drywall leaves 1 5/8 inches nominal stud penetration; follow the screw maker’s requirements.
- Hook centerlines: x = 4, 12, 20, 28. Set actual hook bases near z = 3 inches, adjusting to their hole pattern. Do not let hook screws penetrate the wall or collide with other screws.
Assembly
- Cut the plywood. Cut the backboard and shelf square. Cut three 4 1/2-inch-square blanks and divide each diagonally, using one triangle from each; keep the spare halves. Support and clamp small blanks safely while cutting.
- Lay out the hardware. Dry-fit shelf, three gussets and actual hooks. Mark all screw locations from the joint notes and check interference. Do not mark hook holes from a generic drawing; use the selected hook bases.
- Build the shelf assembly. Glue shelf to backboard and clamp square. Drill clearance holes through shelf and pilots into the backboard edge, then drive the four top screws. Glue gussets into position; fasten through the back first, then through the shelf. Keep heads on the rear flush so the rack seats flat.
- Finish and add hooks. Allow glue cure, ease corners and sand. Apply and cure finish. Pilot hook holes with a depth stop and install the hooks using screws that fit the plywood thickness. Verify tips do not protrude from the rear.
- Mount to studs. Locate and verify two sound stud centers 16 inches apart and check for services before drilling. Level the rack, transfer mounting holes and pilot as required by the structural screw maker. Fasten all four wall screws with the rack supported; do not crush the backboard. If stud spacing or wall construction differs, stop and use a separately designed mounting detail.
- Check before use. Check shelf joints, hooks and all wall fasteners, then add ordinary items gradually. Stop for movement, splitting or loose hardware. Do not assign a capacity from the hook packaging alone; the entire assembly and wall connection matter.
Use and care
- Do not use as a grab bar, climbing aid or support for a person.
- Keep heavy or breakable objects off the shallow shelf. No assembly load rating is established.
- Periodically inspect mounting screws, hook screws and gusset joints.
Build notes
This original plan has not been physically build-tested. Digital checks cover dimensions and part fit; they do not establish joint strength, load capacity or long-term performance. Check the actual materials and hardware, dry-fit before fastening, and stop use if joints loosen or parts deform.