
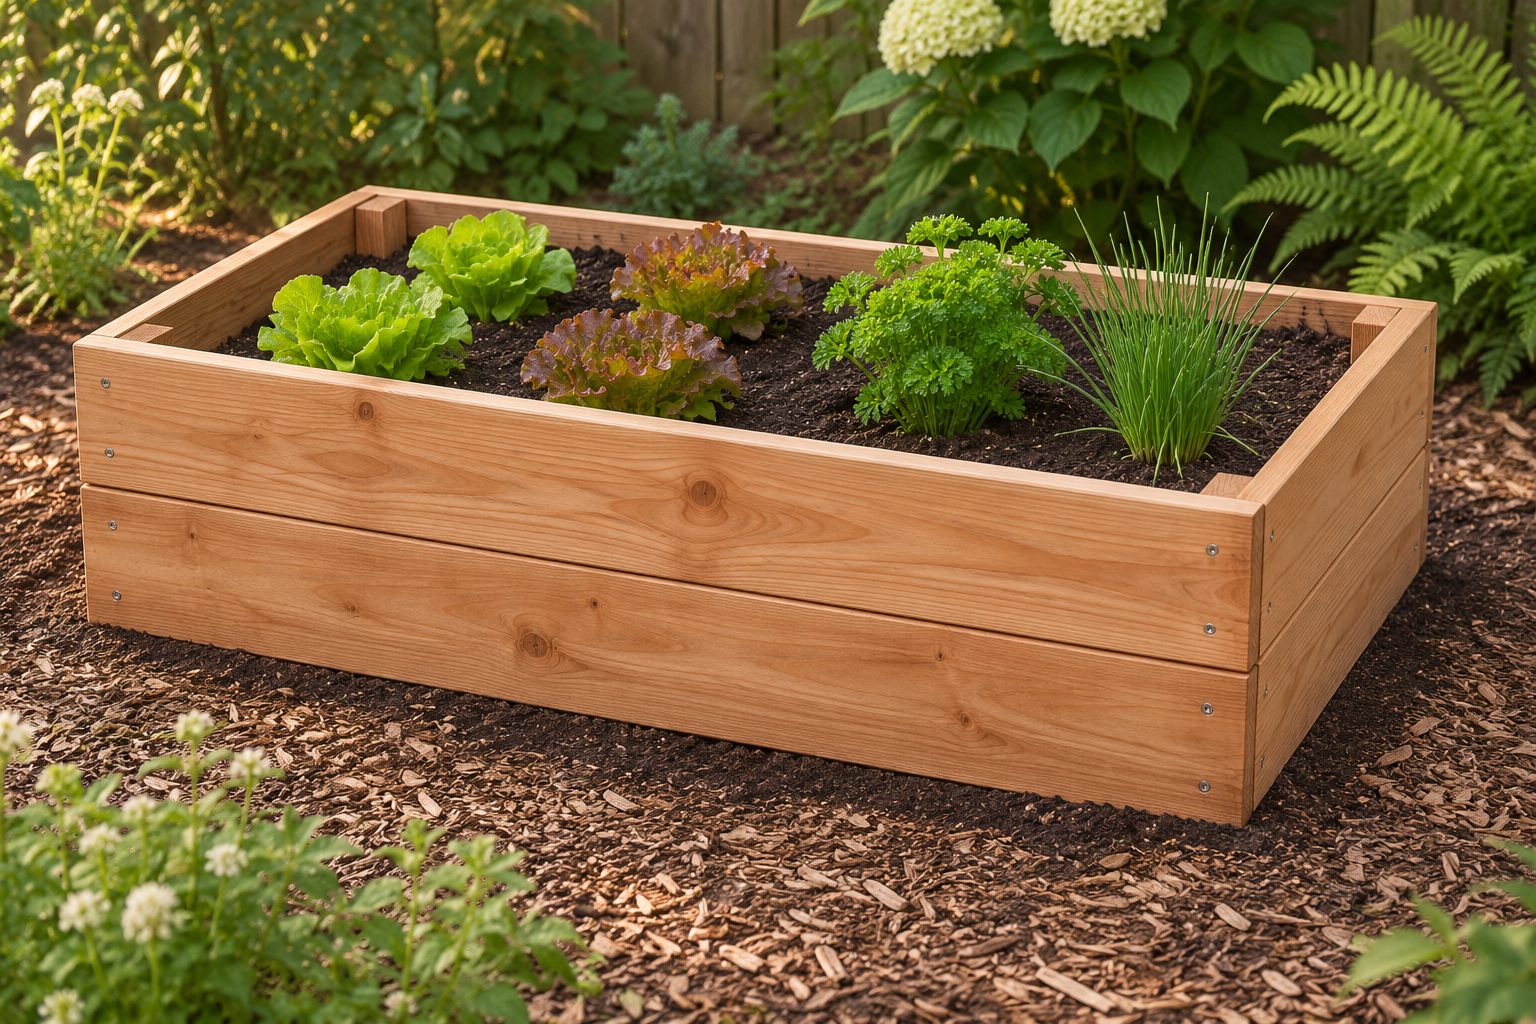
A compact bed for herbs and greens
Give a small patch of garden a defined growing space with two courses of cedar boards and four inside corner cleats. The 48 × 24-inch footprint is narrow enough to reach across, and the 11-inch sides hold added growing soil above the surrounding ground. Plant herbs, leafy greens or other crops suited to your site and season.
This is an open-bottom raised garden bed placed directly on prepared soil. It has no floor or legs, so the ground carries the soil weight. It is not an elevated planter for a deck or balcony. The inside opening is 45 × 21 inches before the four corner cleats. Leave about 1 inch of watering space below the top edge.
Choose the location and lumber
- Mark a 48 × 24-inch rectangle on level garden ground. Leave working room around it and check sunlight, water access and existing drainage before building. Prepare the underlying soil for the crops you intend to grow.
- This shallow, open-bottom design relies on access to the soil beneath it. Do not set it on concrete, a deck, a roof, or a sealed liner. Do not use it to contain contaminated soil or solve a poorly drained site.
- Use untreated, surfaced cedar: actual 1 1/2 × 5 1/2-inch wall boards and actual 1 1/2 × 3 1/2-inch cleats. Select sound boards without loose knots or splits around the corners. Rough-sawn cedar and thin fence pickets do not match this cut list.
- If actual wall thickness is t, keep the outside width at 24 inches by cutting the ends to 24 − 2t. The stated hole locations and cleat layout assume t = 1 1/2 inches; lay out a scrap corner before drilling different stock. Height is twice the actual wall-board width.
Materials and cut list
- Four untreated cedar 2×6×8-foot boards. Cut one 48-inch A and one 21-inch B from each board; the remaining length allows saw kerf, end trimming and offcuts.
- One untreated cedar 2×4×4-foot board for four 11-inch corner cleats C. Four pieces plus three 1/8-inch kerfs use 44 3/8 inches, leaving trimming allowance.
- 32 #10 × 2 1/2-inch stainless-steel exterior wood screws suitable for cedar and wet outdoor exposure; buy a few spares. Use the screw maker’s pilot-hole guidance. No drywall screws.
- Approximately 5 1/3 cubic feet of growing mix fills to 10 inches deep after subtracting the cleats, before settlement. Three 2-cubic-foot bags provide a practical starting quantity. Actual fill needs depend on prepared ground level and settlement. No soil rests on a wooden floor.
| Part | Quantity | Length | Actual width | Thickness |
|---|---|---|---|---|
| A — Long wall boards | 4 | 48 in | 5.5 in | 1.5 in |
| B — End wall boards | 4 | 21 in | 5.5 in | 1.5 in |
| C — Internal corner cleats | 4 | 11 in | 3.5 in | 1.5 in |
Drawings and corner connections
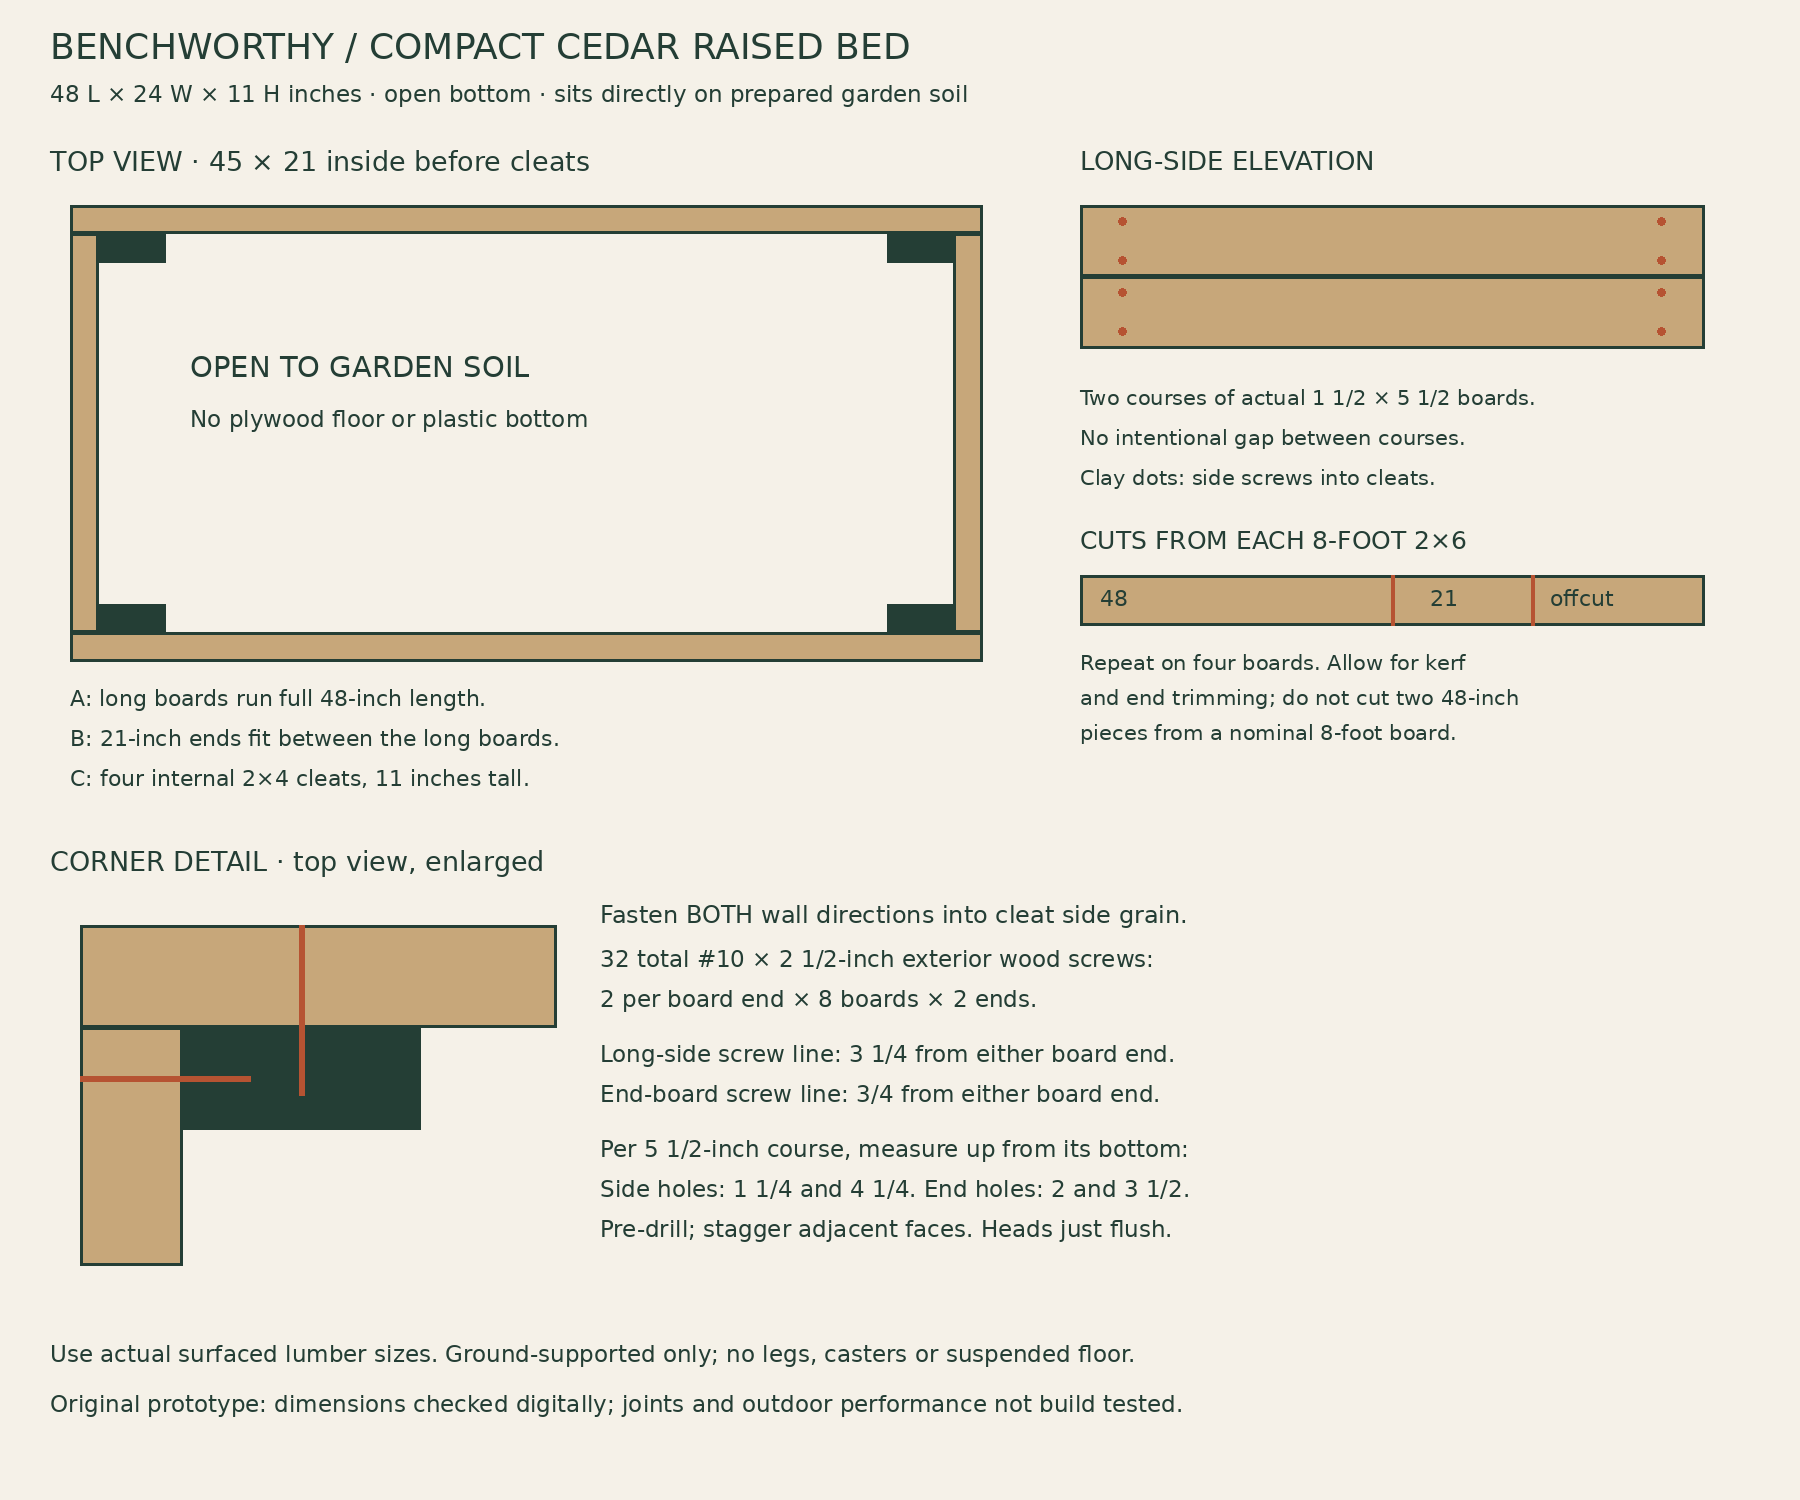
Each cleat stands vertically for the full 11-inch height, flush with the top and bottom. Its 3 1/2-inch face lies against the inside of a long wall, and its 1 1/2-inch edge meets the inside of an end wall. Screws enter from outside through a wall board into the cleat; the connection does not depend on driving into the end grain of an end board. A 2 1/2-inch screw through a 1 1/2-inch wall has about 1 inch of nominal penetration into the cleat, before accounting for its tip and head seating.
Build and install the bed
- Cut and label the parts. Check actual stock dimensions, square an end, then cut four 48-inch sides, four 21-inch ends and four 11-inch cleats. Clamp matching parts together to check lengths. Ease exposed edges and remove splinters; keep mating faces square.
- Lay out a scrap corner. Use offcuts to confirm cleat orientation and screw paths. On each long board, mark screw lines 3 1/4 inches from its ends. On each short end board, mark lines 3/4 inch from its ends. These lines center the screws in the cleat faces for the specified lumber.
- Drill the wall boards. For each 5 1/2-inch-wide board, mark side-board holes 1 1/4 and 4 1/4 inches above its bottom edge. On end boards, use 2 and 3 1/2 inches. The stagger keeps adjacent screw heights separate. Drill wall clearance holes and cleat pilots to suit your screws; use a depth stop. Do not countersink deeply.
- Make the two long walls. Lay two long boards edge to edge on a flat surface to form an 11-inch-high wall. Position one cleat at each end, with its end-facing edge set back 1 1/2 inches from the long-board end. Keep cleats flush top and bottom. Clamp, pilot and drive two screws through each board into each cleat: eight screws per long-wall assembly.
- Join the ends. Stand the long walls parallel and fit two 21-inch end boards between them at each end. Clamp the corners, keeping both courses aligned. Pilot into the cleat edges and drive two screws through each end of each end board: sixteen additional screws. Seat heads flush without crushing the cedar.
- Square and position. Compare outside corner-to-corner diagonals; both should be equal, approximately 53 11/16 inches for the 48 × 24 footprint. Check corner joints and the 24-inch outside width. With help as needed, move the empty frame onto prepared garden soil. Level it with continuous support beneath the walls rather than isolated blocks.
- Fill and check. Confirm the frame is square and all corners are tight before filling. Add suitable growing mix gradually and evenly, stopping about 1 inch below the rim. Watch for bowing, splitting or opening joints; stop and empty the affected area if the frame moves. Water and recheck after settlement. Do not move the bed while filled.
Growing space and care
At a 10-inch fill depth, the nominal soil volume is (45 × 21 − 4 × 3 1/2 × 1 1/2) × 10 ÷ 1,728 = 5.35 cubic feet. This is a buying estimate, not a load rating. Crop spacing and root depth still matter; the open bottom gives roots access to prepared native soil.
- Leave the cedar unfinished for this version. Soil contact and weather will eventually deteriorate untreated wood; inspect corners and replace damaged boards as needed.
- Keep the rim clear of seats, climbing supports or heavy pots. This frame is not designed as a bench or retaining wall.
- Do not add legs, casters, more wall courses or a floor using this same connection detail. Those changes create different loads and need a separate design.
Build notes
This original plan has not been physically build-tested. Part fit, cutting allowance, screw layout and soil-volume arithmetic have been checked digitally. Joint durability, soil-pressure performance and service life have not been established by a physical build.
Gardening reference: Utah State University Extension — Raised Bed Gardening. USU describes cedar as naturally rot-resistant and recommends open bottoms for beds less than 12 inches deep so roots can reach existing soil. This reference supports the gardening approach; it does not validate this original joinery design.