Project types: Tables and desks

  • Compact freestanding plant stand

    Compact freestanding plant stand

    What you will build

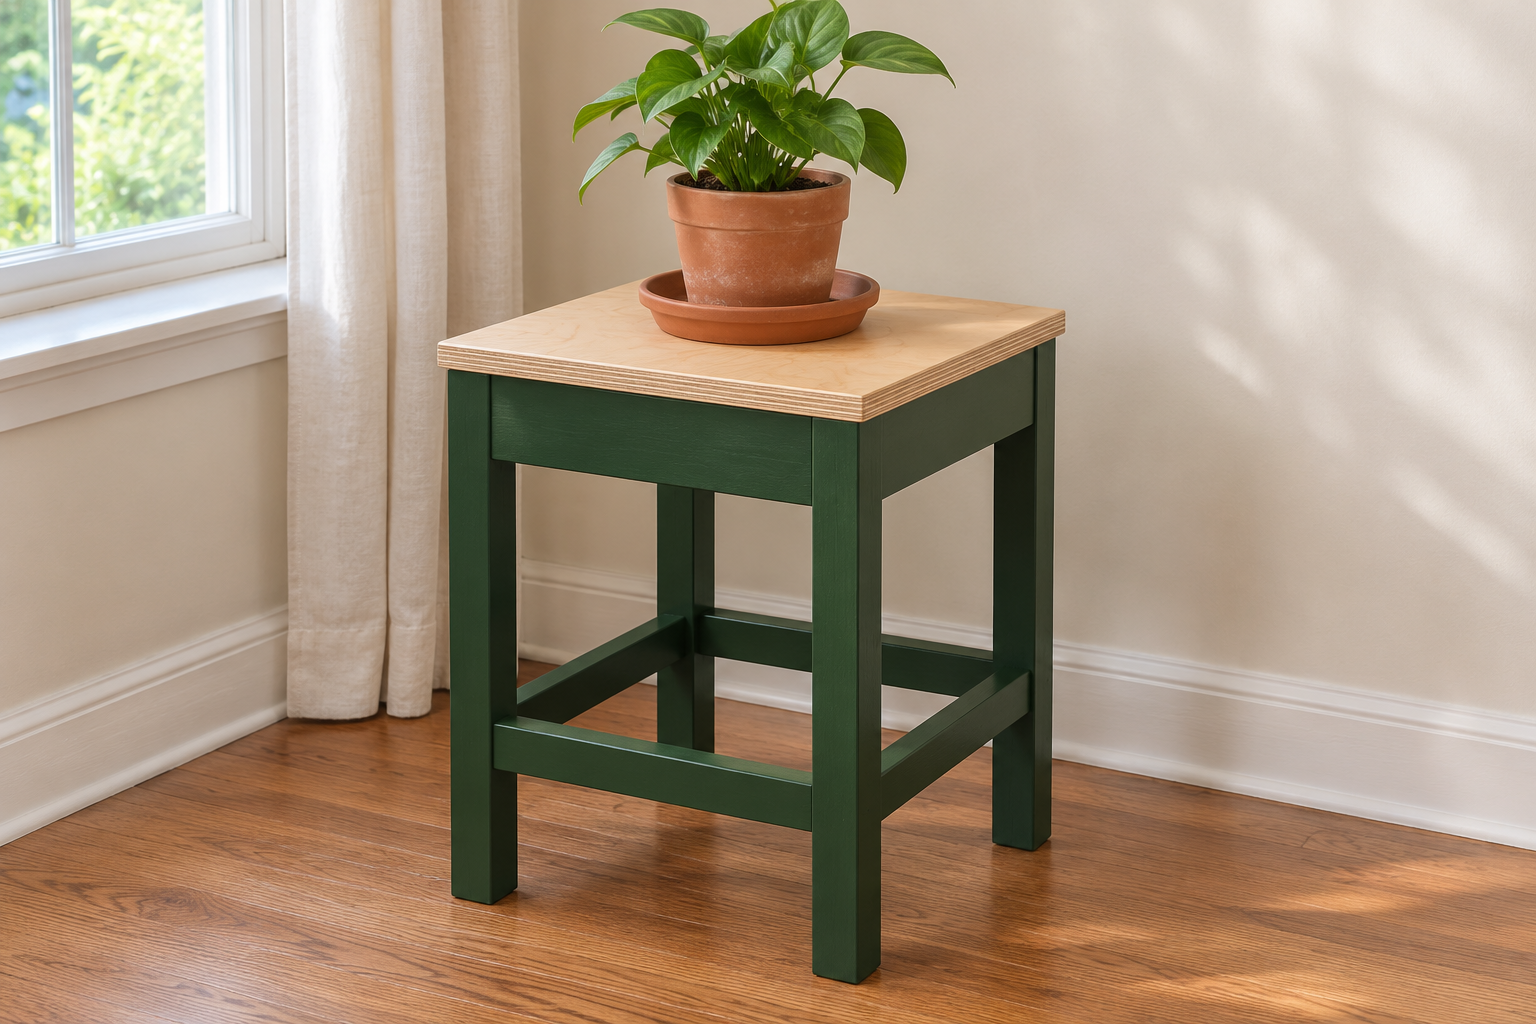
    Raise one small houseplant on a compact four-leg stand. A plywood top provides room for a waterproof saucer, and lower rails tie the legs together without adding a shelf. The render shows a compact plant so the intended scale is clear.

    Check the fit

    • Top 14 × 14 inches, height 18 inches. Leg frame outside 13 1/2 inches square; top overhang 1/4 inch on each edge.
    • Use a saucer no larger than 10 inches across and keep the pot centered. This is a footprint limit, not a weight rating; a tall or top-heavy plant can still overturn the stand.
    • Indoor use on a flat floor. It is not a stool, step, or outdoor planter support.

    Materials and tools

    • One 14 × 14-inch piece of actual 3/4-inch plywood
    • One 8-foot 2×2, actual 1 1/2 square
    • One 4-foot 1×3 and one 6-foot 1×2, actual 3/4 inch thick
    • 24 pocket-hole screws, 1 1/4 inch, thread suited to selected wood; 8 #8 × 1 1/4-inch wood screws; glue
    • Indoor furniture finish and waterproof plant saucer

    Tools: Circular saw or miter saw for square crosscuts; guide for plywood; Drill/driver and pocket-hole jig with matched bit and depth collar; Joint clamp, square, ruler and sandpaper.

    Cut list

    PartQtyLengthWidthThickness
    A — Plywood top114 in14 in0.75 in
    B — Square legs417.25 in1.5 in1.5 in
    C — Upper aprons410.5 in2.5 in0.75 in
    D — Lower rails410.5 in1.5 in0.75 in
    E — Top cleats28 in1.5 in0.75 in

    Drawings and connections

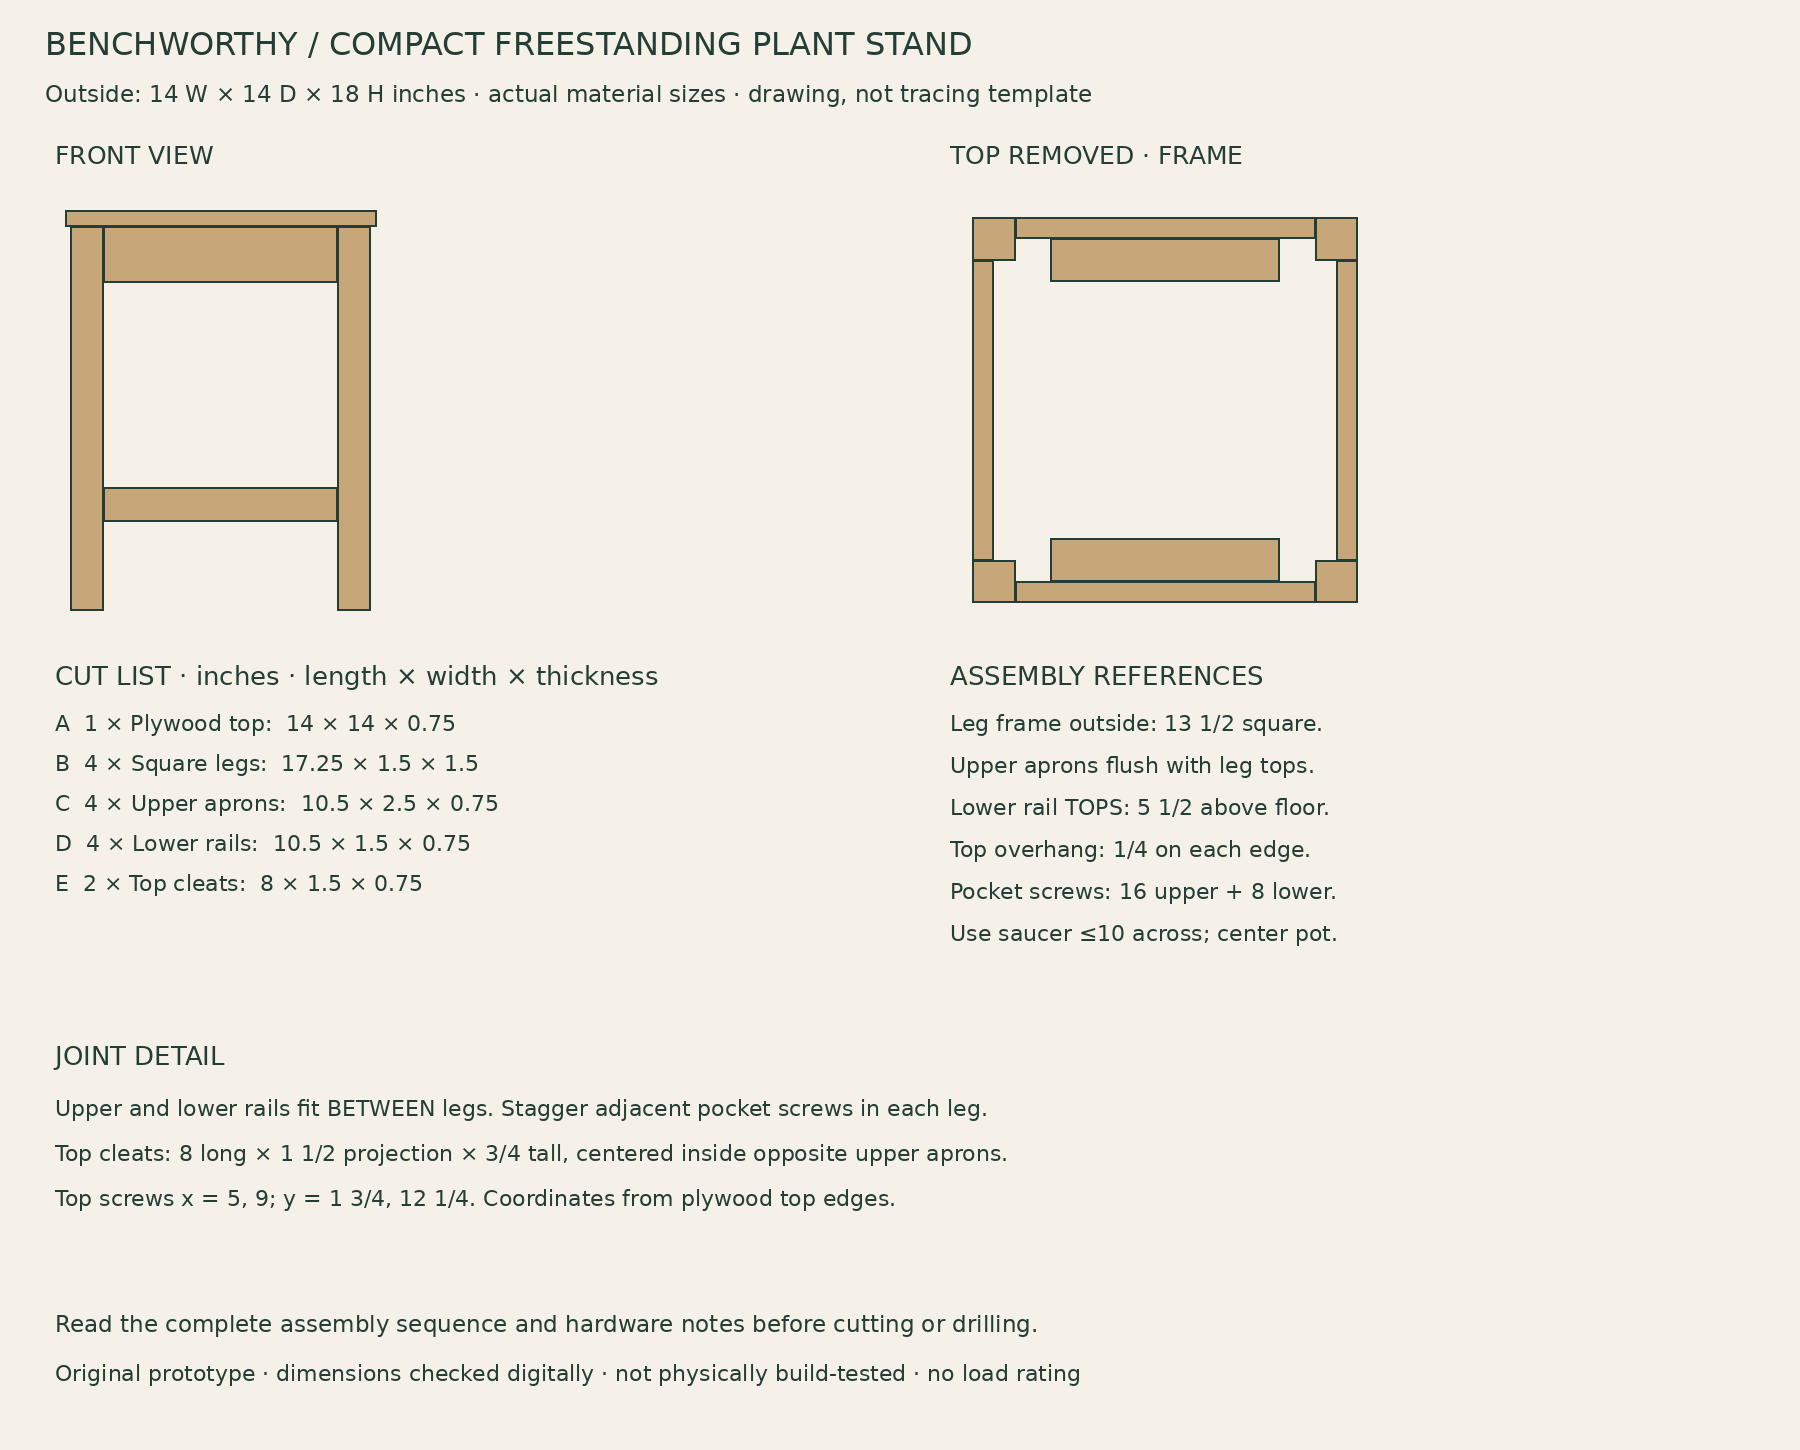
    Compact freestanding plant stand dimensioned front and top views, cut list and connection notes
    Use stated dimensions and actual material thickness. Concept images illustrate use; this drawing and the instructions define construction.
    • Legs are 17 1/4 inches long. Aprons and lower rails fit BETWEEN legs, with their outer faces flush to the outside leg faces.
    • Upper apron tops flush with leg tops. Lower rail TOPS are 5 1/2 inches above the floor. Two pocket screws per upper apron end and one per lower rail end: 24 total.
    • Stagger adjacent pocket-screw paths within the 1 1/2-inch legs. Make a complete two-apron scrap corner using your jig before drilling all parts. Do not assume two crossing screws can occupy the same height.
    • Two 8-inch top cleats mount inside opposite upper aprons, centered along each apron and flush at the top. Cleats lie flat: 1 1/2-inch projection, 3/4-inch vertical thickness. Glue and use two screws through each apron into its cleat.
    • Attach the plywood top with four downward screws into the cleats, at x = 5 and 9; y = 1 3/4 and 12 1/4 inches from top edges. Use #8 × 1 1/4 screws for all eight cleat/top fasteners.

    Assembly

    1. Cut the stock. Cut the legs as a matched set, four upper aprons, four lower rails and two cleats. Cut the plywood top square. Dry-fit one frame side and confirm a 13 1/2-inch overall width.
    2. Prove the pocket-hole layout. Set your jig for actual 3/4-inch stock and the selected screws. Make a scrap corner with two rails meeting a leg, stagger adjacent holes and check for collisions or breakout. Carry the verified layout onto all corresponding parts.
    3. Assemble two sides. Glue and clamp two legs with an upper apron flush to their tops and a lower rail top at 5 1/2 inches. Drive pocket screws while holding the joints flush. Repeat with the opposite side; compare dimensions.
    4. Join the side frames. Connect them with the remaining upper aprons and lower rails. Check all four legs touch a flat surface, then compare diagonals across the frame top. Correct twist before glue sets.
    5. Install cleats and top. Attach the flat top cleats on opposite inside apron faces. Center the plywood top for equal 1/4-inch overhangs. Drill top clearance holes and cleat pilots at the specified positions; stop short of cleat undersides, then drive four screws.
    6. Finish and check stability. Ease edges, finish and fully cure. Put the empty stand on its intended floor and check for rocking. Add the centered pot and saucer gradually near floor level first. Do not use with a plant that makes the stand unstable.

    Use and care

    • Use a waterproof saucer and wipe water promptly. Do not allow water to pool on the top.
    • Lift the empty stand by the frame, not the plant. Recheck pocket joints and screws.
    • No load capacity or tip-resistance rating is claimed; physical testing is outstanding.

    Build notes

    This original plan has not been physically build-tested. Digital checks cover dimensions and part fit; they do not establish joint strength, load capacity or long-term performance. Check the actual materials and hardware, dry-fit before fastening, and stop use if joints loosen or parts deform.
  • Small side table with lower shelf

    Small side table with lower shelf

    A small table for your reading corner

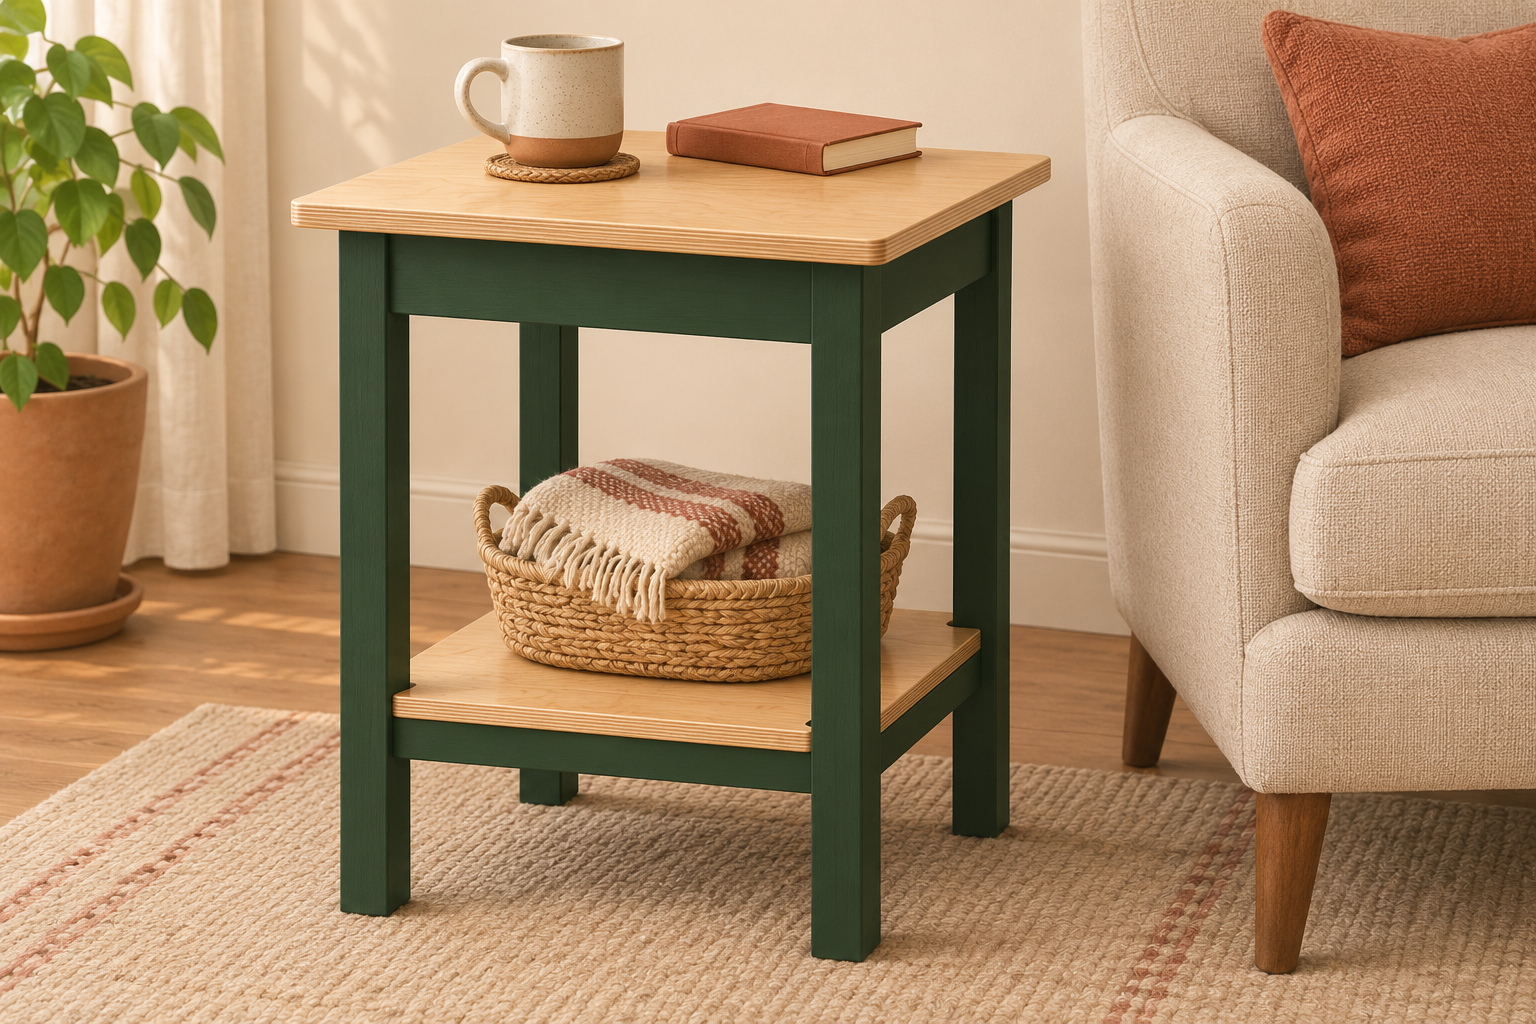
    Set a drink and a book beside your chair, with a basket or spare reading material on the lower shelf. This 18-inch-square side table keeps the footprint compact and the storage open. Straight square legs and aprons give it a familiar furniture shape without drawers or complicated joinery.

    The plywood top is 24 inches above the floor. A notched lower shelf rests on four rails and is fastened to them to help keep the lower frame square. Upper aprons connect the legs beneath the top. This is indoor occasional furniture; it is not a seat or a step, and no load capacity is assigned.

    Check the fit beside your chair

    • Tape an 18 × 18-inch square beside the chair and compare a 24-inch top height with the chair arm. Confirm you can reach the surface comfortably and still walk around it.
    • The lower shelf is 15 3/8 inches square before its corner notches. The clear front width between legs is 12 1/2 inches. Clear height from the shelf surface to the upper apron bottom is 12 inches. Choose a basket smaller than both openings, including handles, so it slides out without tilting.
    • This plan uses a 3/4-inch plywood top. Do not replace it with a solid-wood panel using the same fixed screw pattern; solid wood needs an attachment that permits seasonal movement.
    • Use dry, straight, square stock and a flat indoor floor. Added feet, a thicker top or tapered legs change the dimensions and stability assumptions.

    Cut list

    Dimensions are inches. Nominal 2×2 legs must measure 1 1/2 inches square. The 1×3 aprons measure 3/4 × 2 1/2; the 1×2 rails/cleats measure 3/4 × 1 1/2. Verify actual stock before cutting. Leg length = 24 minus top thickness. With the same 15 1/2-inch outer frame, rail/apron length = 15 1/2 minus twice the leg width.

    IDPartQtySize
    ATop118 × 18 × 3/4 plywood
    BLegs423 1/4 × 1 1/2 × 1 1/2
    CUpper aprons412 1/2 × 2 1/2 × 3/4
    DLower rails412 1/2 × 1 1/2 × 3/4
    EShelf blank115 3/8 × 15 3/8 × 3/4 plywood
    FTop cleats28 × 1 1/2 × 3/4

    Cut a 1 1/2 × 1 1/2-inch square from each shelf corner. With a 15 1/2-inch outside frame and 1 1/2-inch legs, the shelf sits 1/16 inch inside the outside leg faces, with the same nominal clearance at the notch corners. Dry-fit and adjust for actual leg dimensions; do not force the shelf between legs.

    Stock allocation: one 24 × 48-inch 3/4-inch plywood panel supplies top and shelf. One 8-foot 2×2 yields four 23 1/4-inch legs with nominal 1/8-inch kerfs. One 6-foot 1×3 supplies four aprons. One 6-foot 1×2 supplies four lower rails and two 8-inch cleats. Allow extra material if ends need more squaring, defects require avoidance, or your stock is undersized.

    Construction drawing

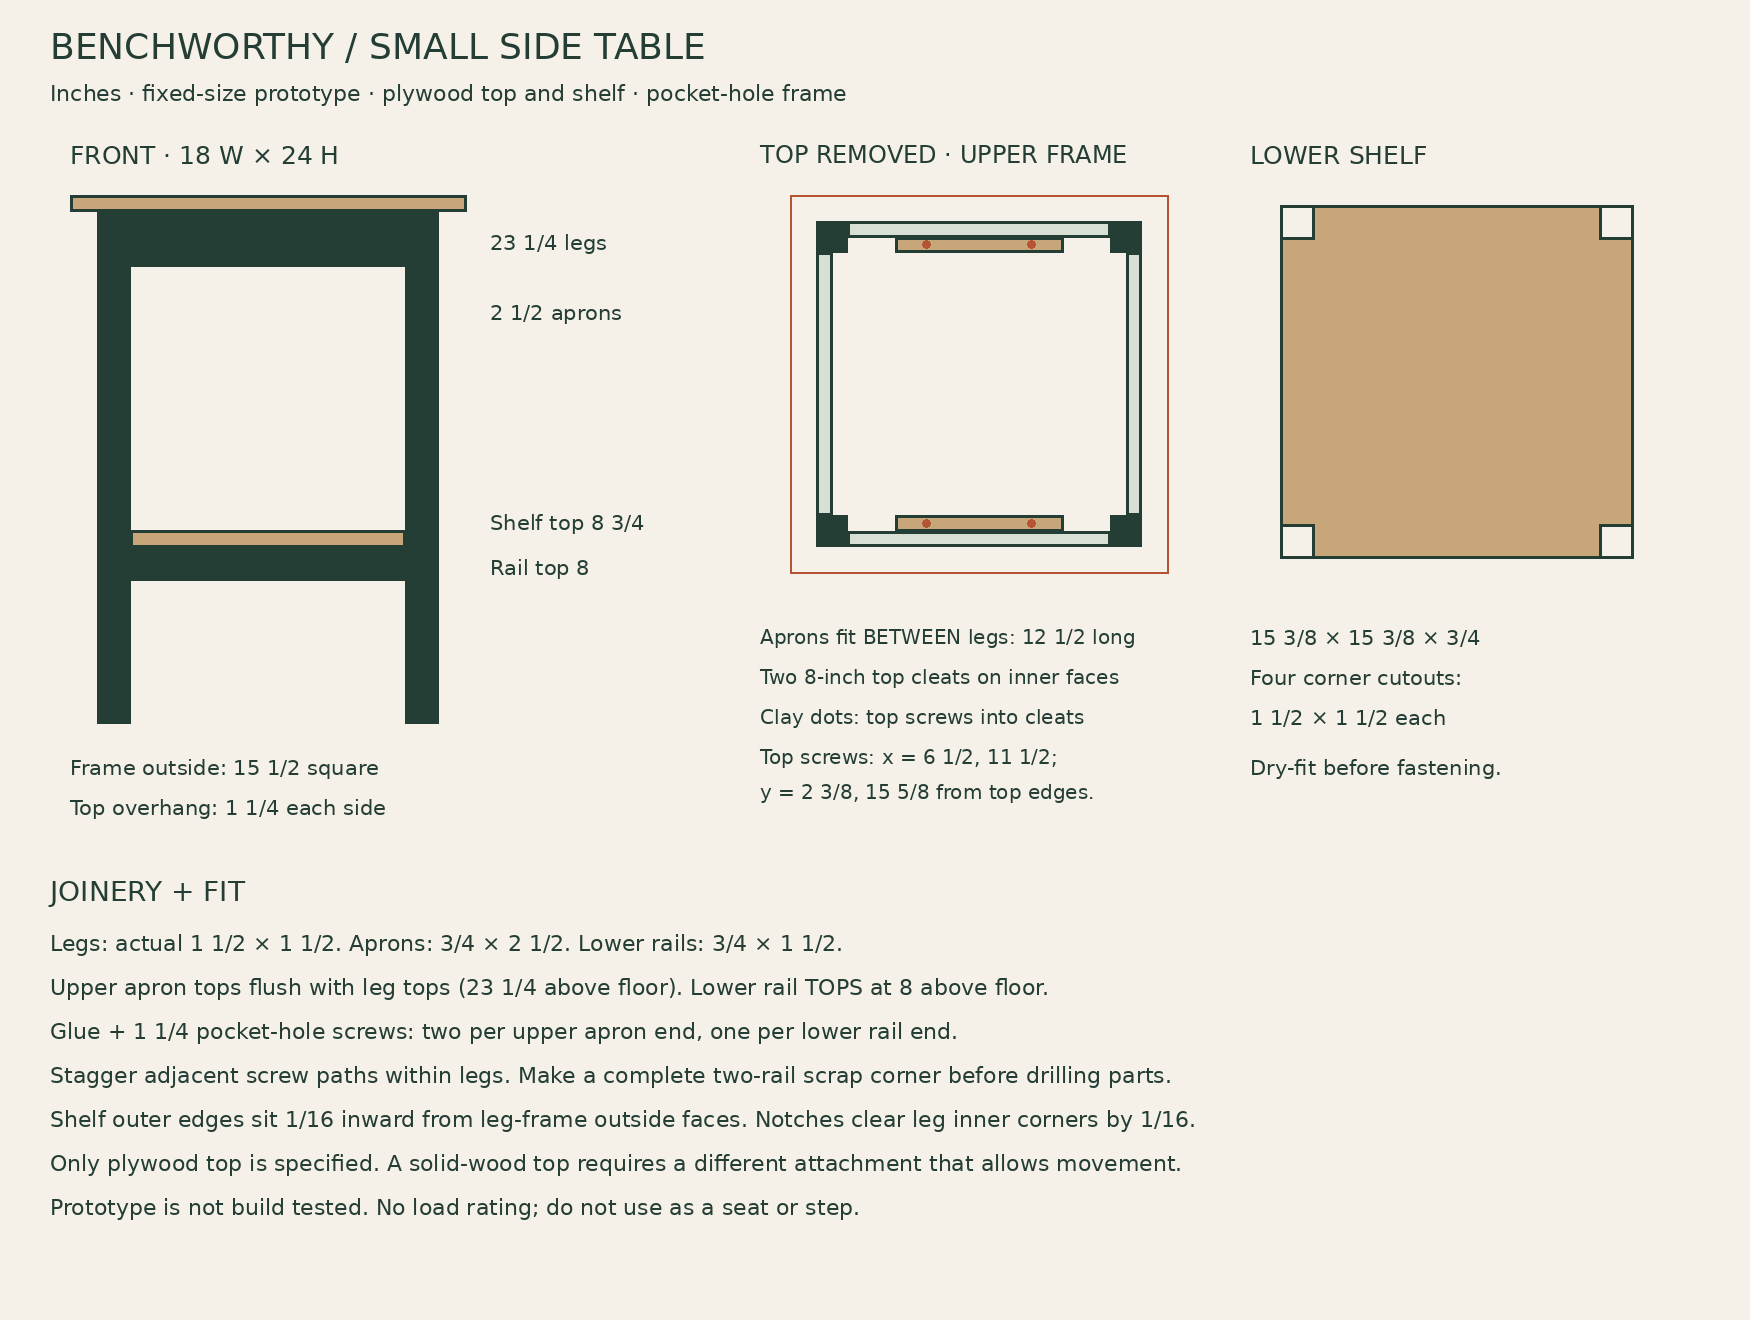
    Front, upper frame and lower shelf construction views showing 18-inch top, 24-inch height, apron joints, top cleats and four corner notches
    Dimensions govern construction. The in-use render shows the intended chair-side storage.

    Hardware and pocket-hole setup

    • Twenty-four 1 1/4-inch pocket-hole screws: sixteen for the upper aprons and eight for the lower rails. Match screw thread to the receiving leg species and follow your jig manufacturer’s settings for actual 3/4-inch material. These are pocket-hole screws with the correct head shape, not ordinary countersunk wood screws.
    • Eighteen #8 × 1 1/4-inch wood screws: six cleat-to-apron screws, four top-to-cleat screws and eight shelf-to-rail screws. Glue for all frame joints, shelf-to-rail contact and cleat attachment.
    • Pocket-hole jig, stepped bit, stop collar and driver, plus a joint clamp. Drill on the inside faces. Adjacent rails meet within the same 1 1/2-inch leg, so their screws must be staggered vertically and checked in a complete scrap corner before drilling the parts.
    • For upper aprons, lay out two hole axes per end. Suggested vertical exit positions are 1/2 and 1 1/2 inches below the top on one opposing pair, and 1 and 2 inches below the top on the adjacent pair. Lower rails use one axis per end, 1/2 inch below the rail top on one opposing pair and 1 inch below on the other pair. Reposition the jig as needed, keep pockets within the rail edges and confirm the actual paths do not meet.
    • If your jig cannot make these staggered holes cleanly within the stock, stop and revise the joint layout before assembly. A scrap test must show seated screws without split edges, breakthrough or collision.

    Manufacturer reference: Kreg pocket-hole setup and screw guidance. Use the instructions for your own jig and actual material; a screw-size chart does not validate this table’s strength.

    Build sequence

    • Cut the four legs together to matching length with square ends. Cut and label the upper aprons, lower rails and cleats. Sand now while the inside faces are accessible. Mark which opposite rail pairs receive each staggered pocket-hole layout.
    • Make a full scrap corner with two rail ends and a matching leg. Test the jig settings, screw length and staggered entry paths. Inspect for collision and breakthrough. Once the corner works, drill all frame pockets on their inside faces.
    • Build two opposite side assemblies first. Glue and clamp an upper apron between each leg pair, with its outside face flush to the leg outside faces and its top flush to the leg tops. Glue and attach the lower rail in the same plane, with its TOP 8 inches above the leg bottoms. Drive the pocket screws while the joints are held firmly against a flat reference.
    • Join these side assemblies with the remaining two upper aprons and two lower rails. Keep each outside face flush with the adjacent leg faces. Confirm the outer frame is 15 1/2 inches square, compare diagonals and clamp square while driving screws. The two lower rail pairs must meet at the same top height. Let the glue cure.
    • Cut the plywood shelf blank and its four corner notches. Ease the cut edges. With the table top still off, lower the shelf over the legs onto the four lower rails. Check about 1/16-inch clearance from the outside frame faces and around each notch. Trim only as needed so the shelf lies flat without forcing the frame out of square.
    • Glue the shelf-to-rail contact and add two 1 1/4-inch screws down through the shelf into each rail, centered in the rail’s 3/4-inch thickness and placed away from the pocket screws near its ends. Nominal screw centers are 7 and 11 inches from the tabletop’s left edge on front/rear rails, and 7 and 11 inches from its front on the side rails; use the corresponding shelf position as a reference. Predrill and countersink flush.
    • Attach one 8-inch cleat to the inside of the front upper apron and one to the rear. Center them along the apron length, with their tops flush with the apron tops. Orient each cleat 1 1/2 inches tall and 3/4 inch thick. Glue and use three 1 1/4-inch face screws per cleat, centered vertically and clear of apron pocket screws. Confirm the tips stay within the apron.
    • Set the 18-inch plywood top on the frame with 1 1/4-inch overhang on every side. Clamp in place. Drive four 1 1/4-inch screws from above into the top cleats at x = 6 1/2 and 11 1/2 inches from the top left, paired with y = 2 3/8 and 15 5/8 inches from the front. Pilot and countersink flush. Do not drive screws down into unsupported gaps.
    • Ease the top edges and apply the indoor furniture finish. Allow the finish and glue to cure. Place the table on a flat surface; check all four feet contact the floor, the frame is square and the shelf and top are secure. Use coasters to protect the plywood finish.

    Prototype checks and limits

    Unreviewed prototype — not build tested. Overall dimensions, cut allocation, shelf-notch clearances and nominal joint layouts have been checked digitally. Pocket-hole paths depend on the actual jig and must be checked in scrap. Joint stiffness, shelf performance and tipping resistance remain untested. No load rating is assigned.

    • Use only as a small occasional table after checking the physical build for stability. Do not sit, stand or climb on it, or use it to support machinery or heavy concentrated loads.
    • Keep stored objects within the top and shelf outlines. A small tall table can tip if pulled or heavily loaded at an edge; keep it away from uses where someone would rely on it as a support while standing up.
    • Inspect for rocking, loose screws, opening joints, split legs and shelf separation. Stop use if these appear. A physical prototype is still required before this plan can be marked build tested.