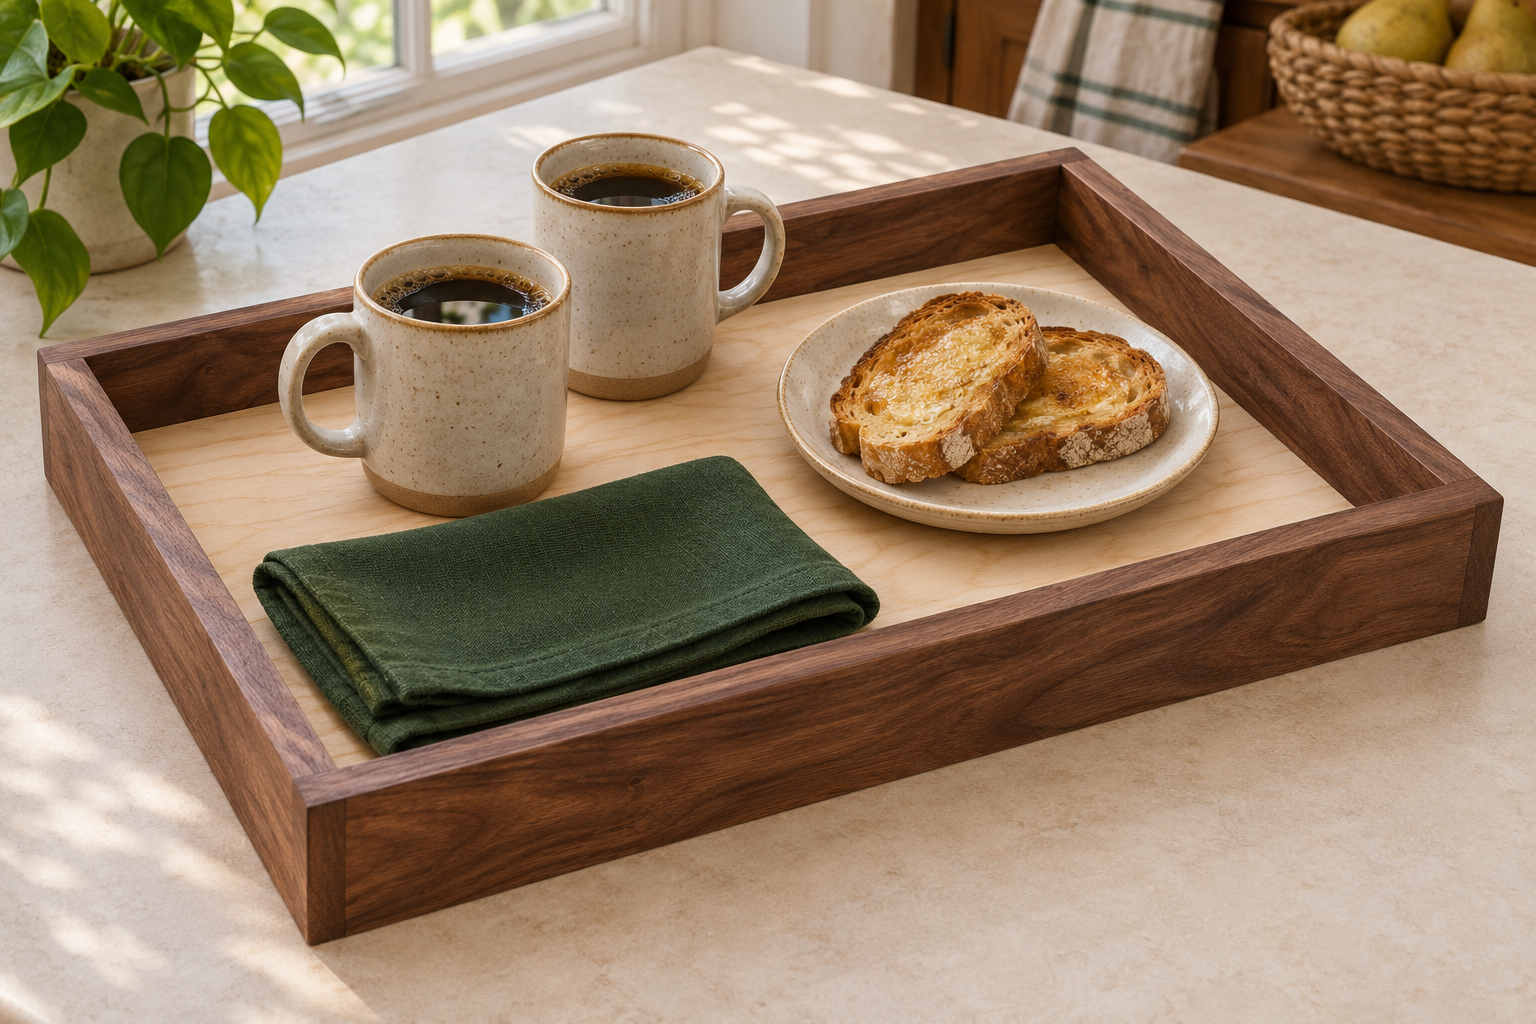
Turn a plywood offcut and short hardwood strips into a tray for two mugs, a small plate and napkins. The shallow rim helps contain dishes on the table. Support the base with both hands when carrying; the rim is not a lifting handle.
Check the fit
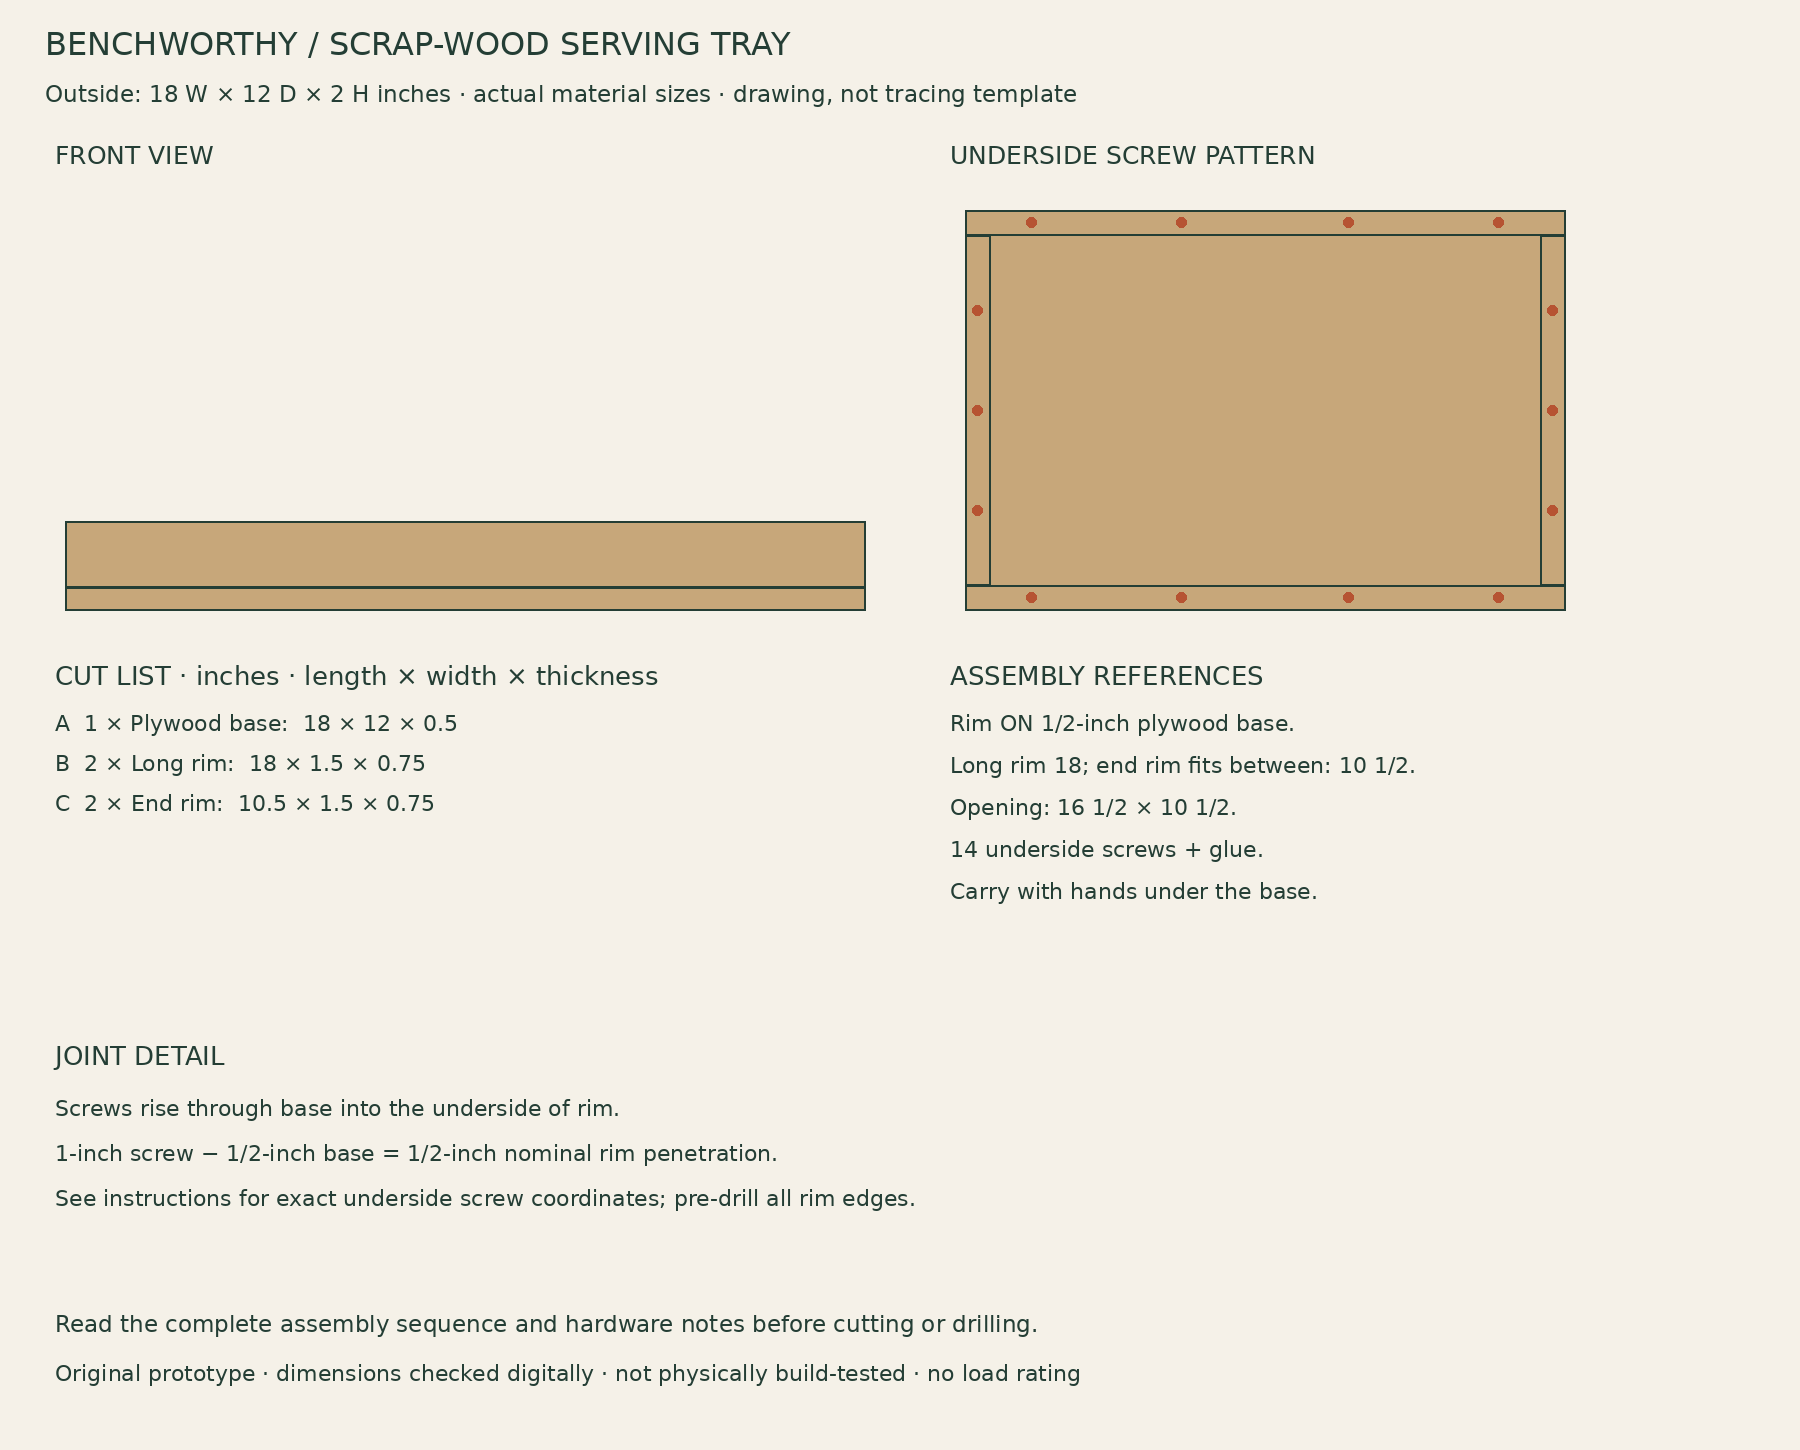
Outside 18 × 12 × 2 inches; usable opening 16 1/2 × 10 1/2 inches. Check your dishes against that opening.
Use a plywood base so seasonal movement does not fight the glued rim. A solid-wood panel needs a different attachment.
Use clean, sound offcuts of known origin; exclude cracks, embedded fasteners and damaged plywood.
Materials and tools
One sound 18 × 12-inch offcut of actual 1/2-inch plywood
Two 18-inch and two 10 1/2-inch lengths of sound hardwood, actual 3/4 × 1 1/2
Wood glue; 14 #6 × 1-inch wood screws
Furniture finish suited to occasional spills; use dishes or a removable liner for food
Tools: Circular saw with guide, or a handsaw with a square cutting guide; Drill/driver, clearance and pilot bits, countersink and depth stop; Clamps, square, tape measure and sanding block.
Cut list
Part
Qty
Length
Width
Thickness
A — Plywood base
1
18 in
12 in
0.5 in
B — Long rim
2
18 in
1.5 in
0.75 in
C — End rim
2
10.5 in
1.5 in
0.75 in
Drawings and connections
Use stated dimensions and actual material thickness. Concept images illustrate use; this drawing and the instructions define construction.
Rim sits ON the plywood base, not around its edge. Long rails run full length; end rails fit between them.
Glue the full rim-to-base contact. Drive screws from the UNDERSIDE into the rim after drilling clearance holes through the base and pilots in the rim.
Long-rim screws: x = 2, 6 1/2, 11 1/2, 16; y = 3/8 or 11 5/8. End-rim screws: x = 3/8 or 17 5/8; y = 3, 6, 9. All measured from base edges.
14 #6 × 1-inch screws: 8 long-rim + 6 end-rim. Nominal penetration into rim is 1/2 inch; keep countersinks shallow and screw heads flush.
Assembly
Cut and dry-fit. Cut the base square and match opposite rails. Set the long rails on the base edges, then fit the short rails between them. Check diagonals and the clear opening before glue.
Lay out the fasteners. Mark the underside screw pattern in the joint notes. Drill base clearance holes. Clamp the rim in place, transfer the hole locations and drill depth-limited pilots in the narrow rim edges. Test on scrap first.
Glue and clamp. Spread glue over the rim-to-base contact faces, assemble on a flat surface and clamp with pads. Drive the underside screws by hand or with a low clutch. Do not use screws to pull a twisted rail flat.
Refine the surface. Allow the glue to cure as directed. Remove squeeze-out, ease the rim and base edges, and sand. Confirm the underside has no proud screw heads that could scratch a table.
Finish and check. Apply the selected finish and allow its full cure time. Begin with unbreakable items on a low surface, check the base and joints, and support underneath with both hands. This design has no load rating.
Use and care
Wipe spills promptly; do not soak or put in a dishwasher.
Serve food on plates or a liner. This is not a cutting board.
Inspect glue lines and screws; stop using it if the base separates or flexes excessively.
Build notes
This original plan has not been physically build-tested. Digital checks cover dimensions and part fit; they do not establish joint strength, load capacity or long-term performance. Check the actual materials and hardware, dry-fit before fastening, and stop use if joints loosen or parts deform.
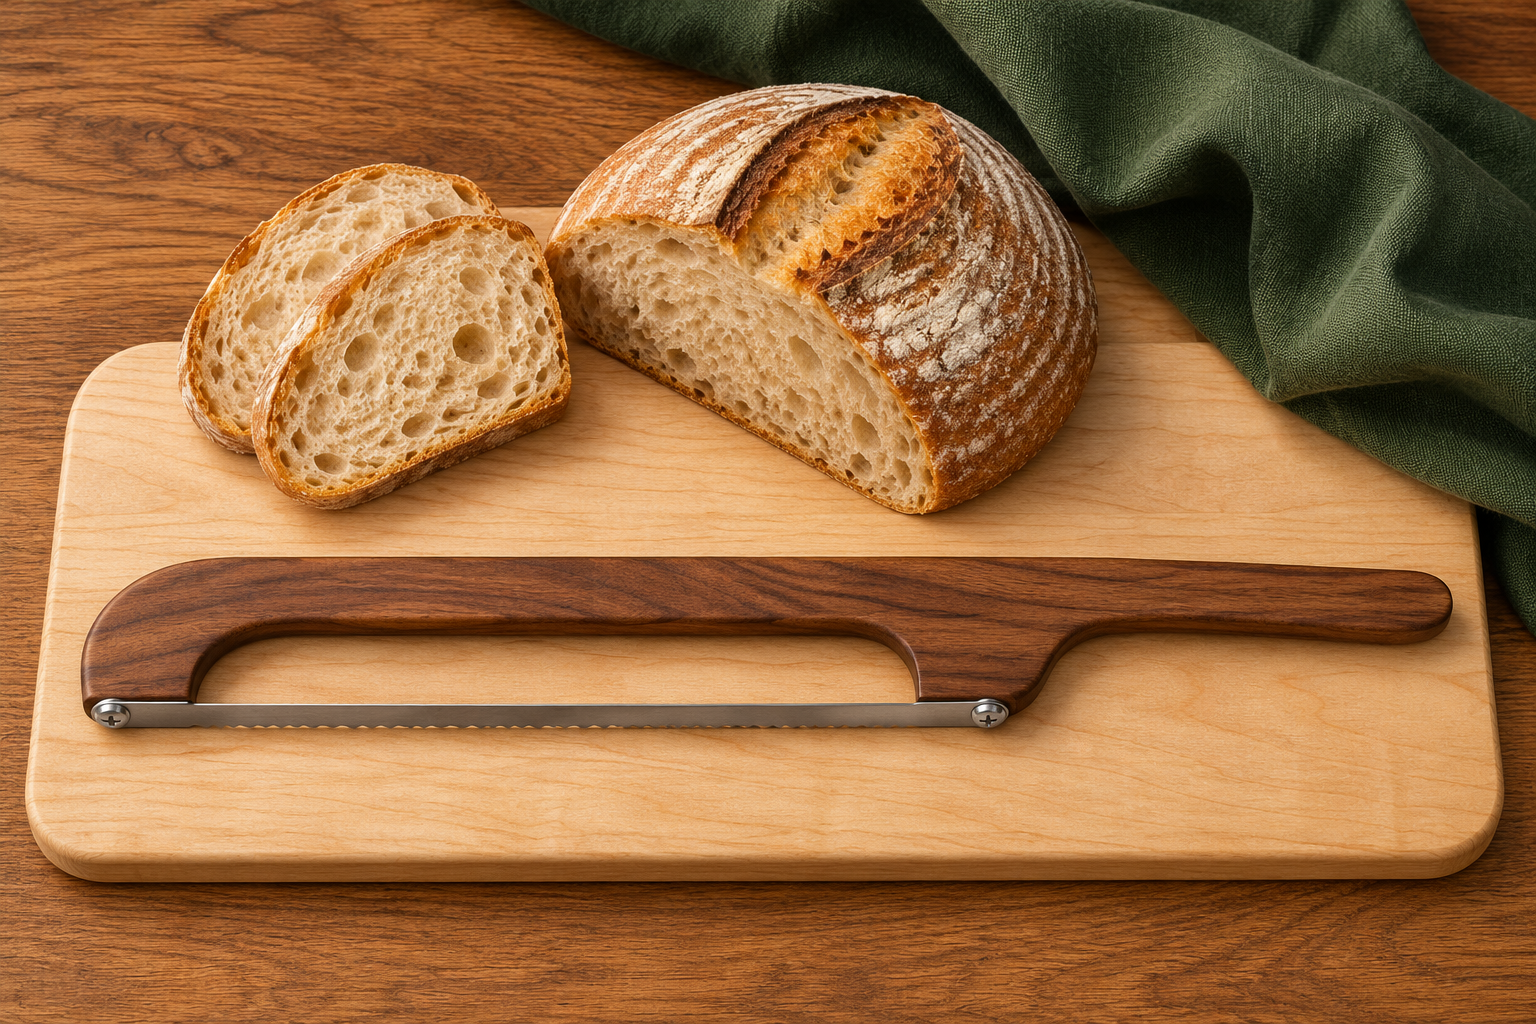
Shape a one-piece hardwood body around a purpose-made serrated bread blade. A slim, gently bowed rail leaves lateral room for the slice. The slim grip flows from the rail and tapers gently toward the blade side, with a rounded end and no stepped offset or dogleg. This is a small woodworking project for a bread-making kitchen or a handmade gift, with a replaceable commercial blade.
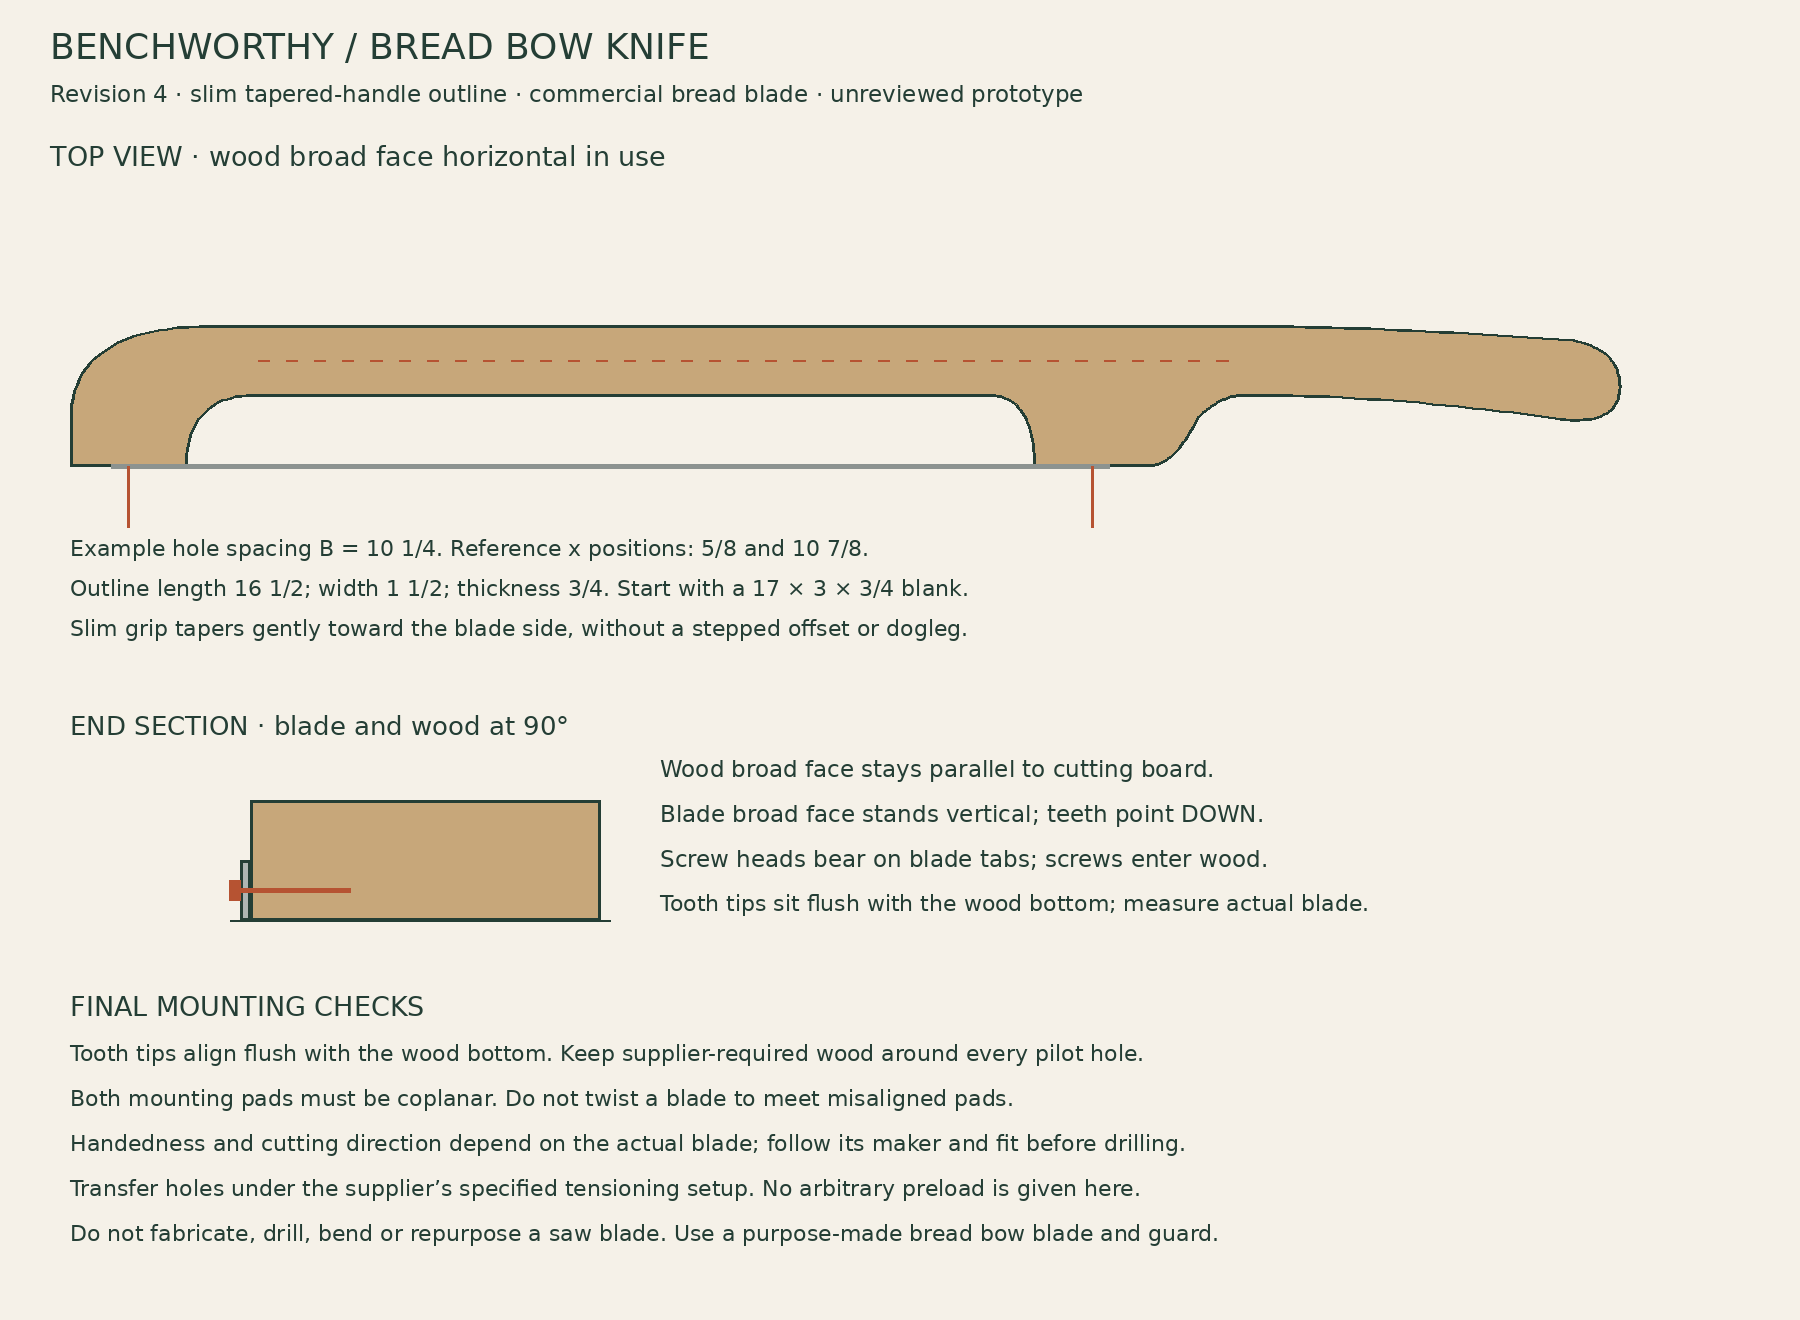
Orientation matters: the broad face of the wooden bow stays roughly parallel to the cutting board. The blade stands perpendicular to it, with teeth pointing down and the tooth tips flush with the bottom of the wood. Both supplied screws pass directly through the blade’s existing end holes into pilot holes in the narrow front edges of the wooden mounting pads; their heads bear on the metal blade tabs. The screw axes are horizontal in use; they do not go down through the broad top face. The concept render and end-section drawing show that relationship.
This is an unreviewed prototype layout. The wooden outline is provided at full size, but blade mounting, handedness and tension must be resolved with the actual hardware before cutting use. The outline is not a universal hardware pattern or a verified tensioning design.
Choose and measure the blade first
Use a purpose-made bread bow knife blade with its specified mounting screws and installation instructions. Do not substitute a bandsaw blade or modify a serrated kitchen blade. Have the hardware in hand before shaping the mounting pads.
Measure B, the mounting-hole center spacing; overall blade length; blade width; hole diameter; the distance from hole centers to the tooth tips; screw length and head shape. Hole spacing and total length are different measurements.
The example uses B = 10 1/4 inches. Schlabaugh & Sons lists a bread-knife kit with a 10.625-inch blade, 10.25-inch mounting-hole spacing and supplied stainless screws. That is a dimensional reference, not a claim that this original wooden outline is their tested kit design. Verify the current product and ask the supplier for its mounting and tensioning requirements.
Nominal pad reference positions are x = 5/8 and 10 7/8 inches from the far tip end. These locate the example span only. Final pilots must be transferred from the actual blade using its maker’s tensioning setup. Do not use those references as drill marks or stretch the whole template to fit another blade.
Check which mounting side and tooth direction suit the blade and intended handedness before drilling. The slot between bow and blade provides slice clearance, not an adjustable or calibrated thickness guide.
Hardware reference: Schlabaugh & Sons bread knife blades/kits. No purchase or brand is required; a different blade needs its own measured layout and suitable mounting instructions.
Wood and hardware list
One dry, straight-grained solid-hardwood blank, 17 L × 3 W × 3/4 inch thick, surfaced flat and parallel. The illustrated outline finishes about 16 1/2 × 1 1/2 inches in top view. Choose sound stock without cracks, knots or abrupt grain runout through the bow or pads.
One purpose-made bread bow blade, its specified screws and a properly fitting blade guard. The example blade span is 10 1/4 inches; the wood does not specify a substitute screw size.
A finish explicitly labeled by its maker for the intended wooden-utensil or food-contact use; follow application and cure directions. Keep paint and decorative coatings out of this build unless their maker approves that use.
Scrap for a full-size mock-up and any supplier-specified installation fixture. No separate turned handle or lathe is needed.
Drawings and full-size outline
Blade is edge-on in the top view. The end section shows the 90-degree mounting relationship.
Download the two-page full-size bow outline (PDF). Print US Letter landscape at Actual Size / 100%, with fit-to-page disabled. Check the 1 × 1-inch square in both directions. Overlap the pages and align both pairs of registration crosses before tracing. The template deliberately has no pilot-hole dots. Keep the mounting pads oversize until the actual blade fits.
Shape and assemble
Measure the blade and read its installation instructions first. Confirm the selected blade can mount to the narrow edges of a 3/4-inch flat wooden body with adequate wood remaining around the pilots, sound screw engagement and a tooth line flush with the bottom of the wood. If those requirements conflict, revise the body or choose a compatible documented kit before proceeding.
Print, calibrate and join the outline pages. Make a paper or scrap mock-up with a blunt blade substitute. Check that the handle feels comfortable and your hand stays behind the heel pad, away from the exposed cutting span. Orient grain along the long axis of the bow.
Trace the outline on the hardwood. Cut outside the line with a bandsaw, scroll saw or jigsaw while supporting the small blank securely. Keep extra wood at both mounting pads. Leave smooth internal curves rather than sharp re-entrant corners; do not thin the bridge or pad roots for appearance.
Sand to the outline and refine the handle. Ease grip edges by hand. Keep the two narrow blade-mounting faces flat, coplanar and unrounded where the metal blade tabs must bear. Avoid rounding those faces with a router. Do all powered shaping with the blade removed.
With the blade guarded and supported, check the actual mounting geometry. In the working orientation the wood broad face is horizontal, the blade face vertical and teeth downward. Transfer the tooth-to-hole offset to the pad edges so the tooth tips align flush with the wood bottom, while preserving the hardware supplier’s required wood edge distances. The pilot center height above the wood bottom equals the actual distance from the blade hole center to its tooth tips. Set both pads on a flat reference surface and verify the alignment with the guarded blade. Do not guess hole height from the photograph.
Use the blade supplier’s tensioning and hole-transfer method. The bow must hold the blade without sag, twist or excessive flex, but this plan does not assign a numerical preload or an end-to-end squeeze distance. Do not use screws to pull an incompatible blade into position. If the supplier gives no tensioning method, resolve that before final drilling; the outline alone does not establish safe tension.
With the blade removed, drill correctly sized pilots perpendicular to the narrow mounting faces, using a depth stop that prevents breakthrough. Test the drill and screw on a matching scrap. Screw axes are horizontal in the knife’s working orientation, not vertical through its top.
Finish all the wood with the selected utensil-compatible product, following its full cure requirements. Keep the blade removed during finishing. Reinstall using the supplied hardware and hand tools as directed; do not use an impact driver or countersink the blade holes. Fit the blade guard.
Before cutting use, physically validate blade seating, screw retention, tension, frame integrity, hand clearance and flush tooth-to-wood-bottom alignment. Check both screw heads bear directly on the metal around the blade’s existing end holes, with no wooden cap covering the ends, and seat without distorting the blade and that the blade reaches the board without the wood stopping it short. Keep the prototype out of service if any item remains unresolved.
Use, cleaning and prototype notes
Not build tested. The original wood outline, reference span and print scale have been checked digitally. Grain suitability, bow flex, blade preload, screw edge distance and retention have not been validated with a physical blade and wood prototype. Do not describe it as a tested sourdough slicer until that validation is complete.
Once validated, use on a suitable cutting board with the teeth down and the supporting hand clear of the cutting path. Let the serrations cut with controlled strokes; stop if the blade shifts, twists or loosens.
Fit the guard for storage. Do not leave the exposed blade loose in a drawer. Follow the blade and finish makers’ cleaning instructions, wipe the wood clean and dry promptly, and do not soak or put the wooden bow in a dishwasher.
Inspect the pads, bow grain, screws and blade before each use. Stop for cracks, loose fasteners, lost tension or corrosion. Replacement blades need the same dimensional and mounting checks; equal overall length alone does not establish fit.